Apple TestFlight
If you would like to test the app before publish, you can do so by using built in service by Apple called TestFlight. There are a few steps required before you can publish the app as a beta to the user to test. Kindly follow the guides below.
Initial Configuration
Navigate to the TestFlight page within the app. Refer the image below.
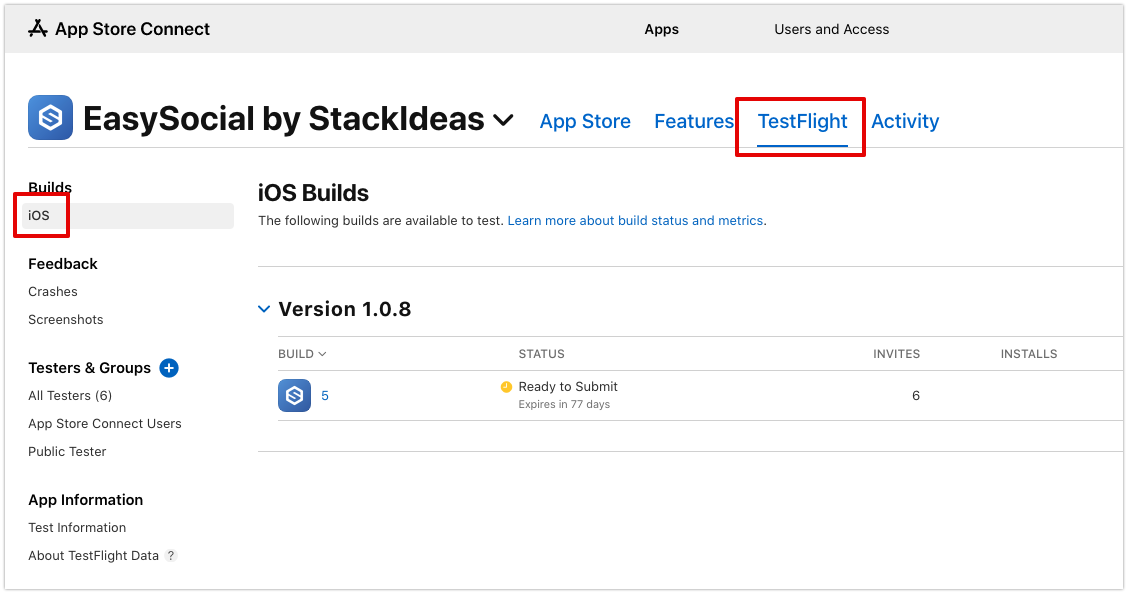
If the app is successfully uploaded to the app store, you should see the list of the app similar like below. If the app doesn't appear from the listing, kindly refer to the following guide, Uploading the App.

Notice that the app above will show
Missing Compliancemessage. In order to resolve that message, click on the app from the listing in order to open the app details page.Once you inside the app details page, click on the
Provide Export Compliance Information.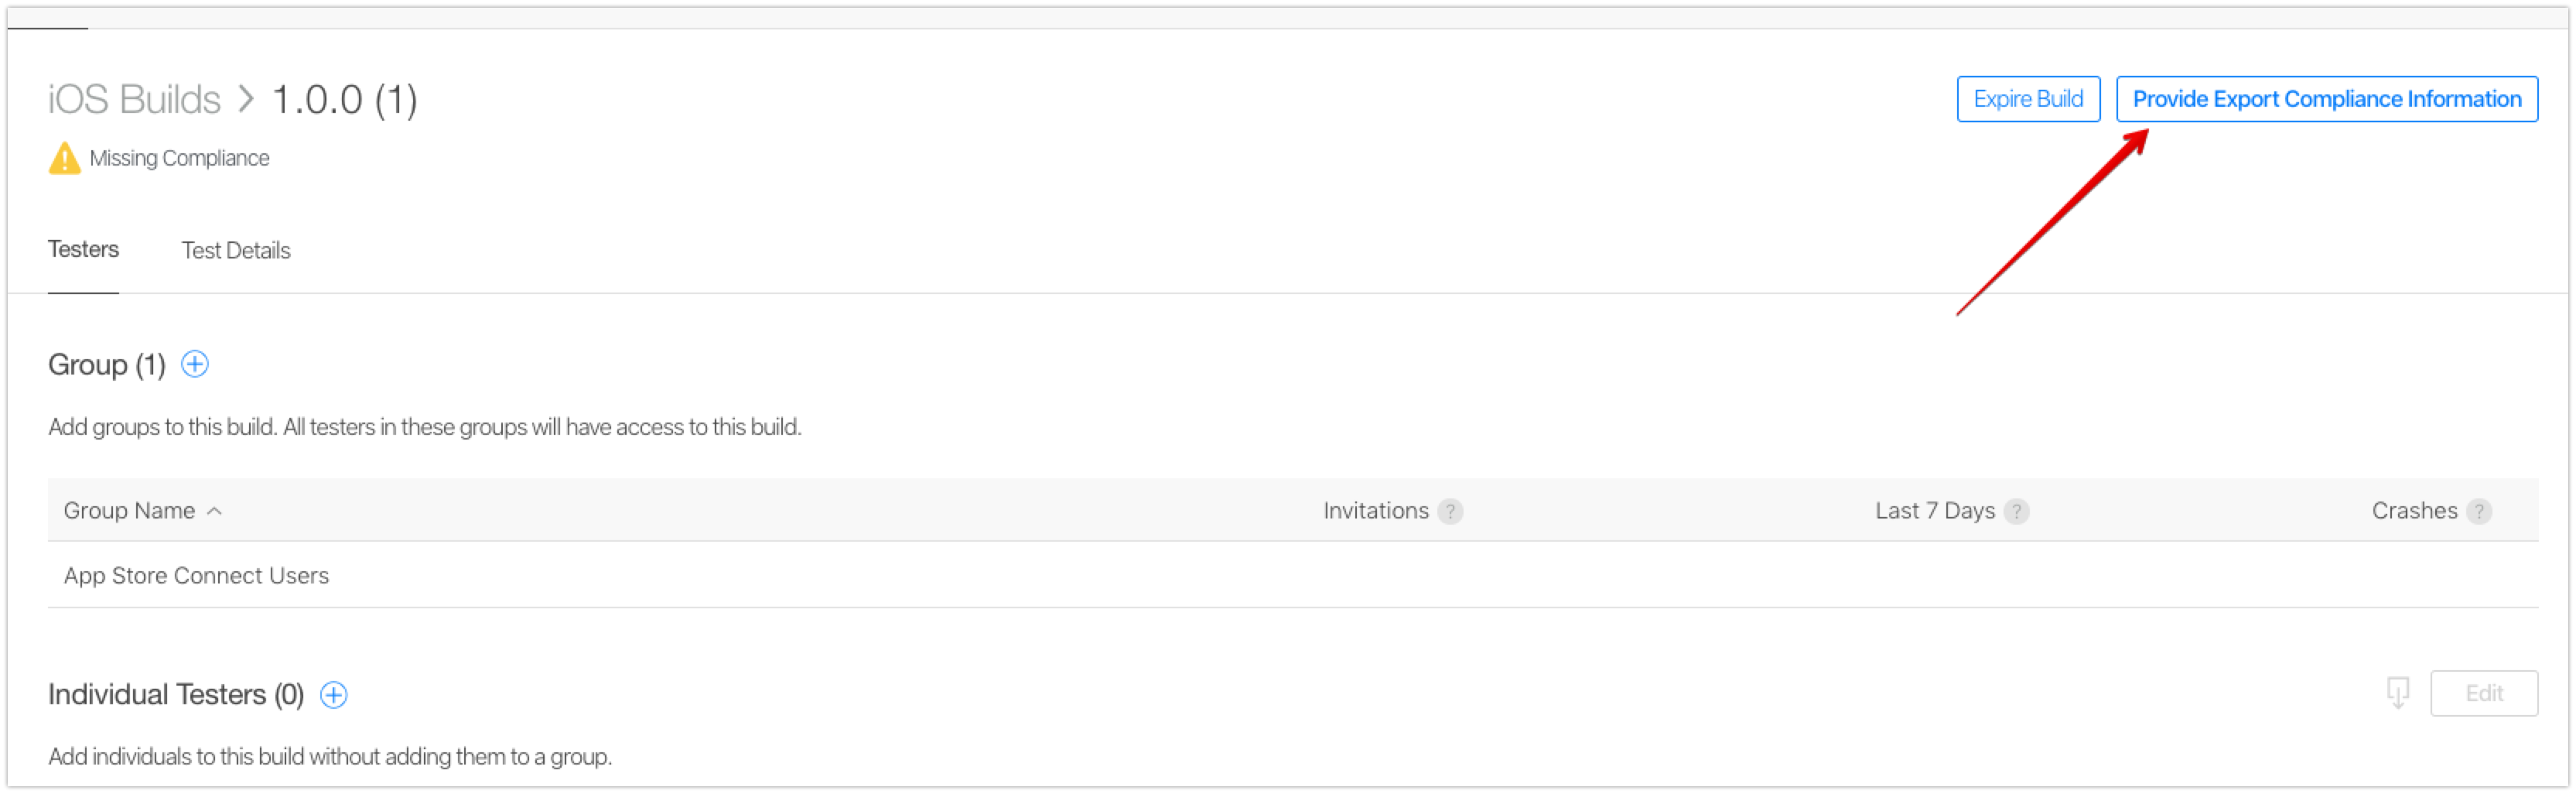
From the options below, choose
Noas the app does not use any encryption. Click onStart Internal Testingafterwards.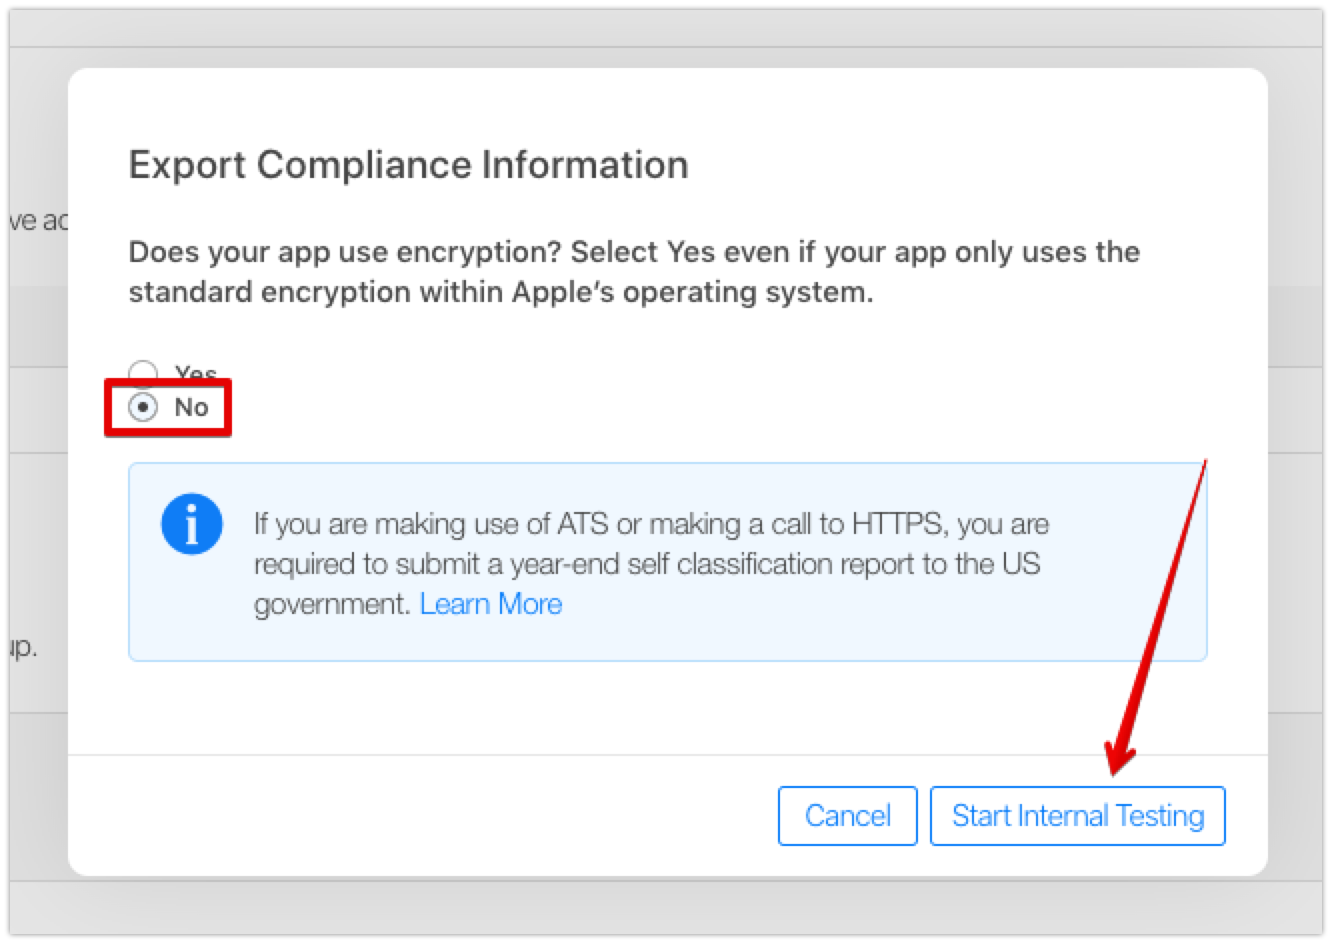
Now the app should be ready for internal testing. Next we will add the internal tester so that the testing can begin internally.
Internal Testing
Navigate to
App Store Connect Users. Choose the users that you would like to add for internal testing.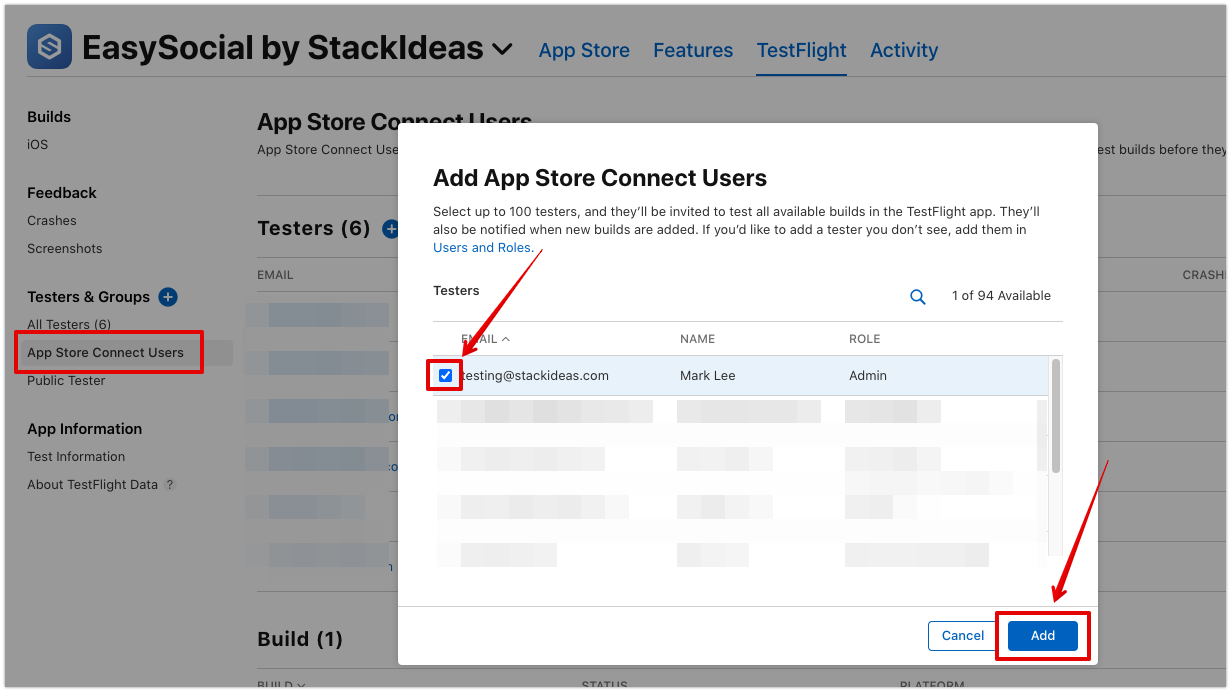
Selected users should be receiving the invitation email as below.
Click on the link provided in the email and follow the instructions inside the link.
External Testing (Optional)
At this point, the app is now technically ready to be submitted for app publishing review. However, if you would like an external user (public user) to help test the app, you may follow the guide below. Firstly, the app must undergo a review process by the Apple team before it can be used for external testing.
App Review Submission
Within the TestFlight page, click on
Add External Testerfrom the sidebar. Enter the name of the group and click oncreate.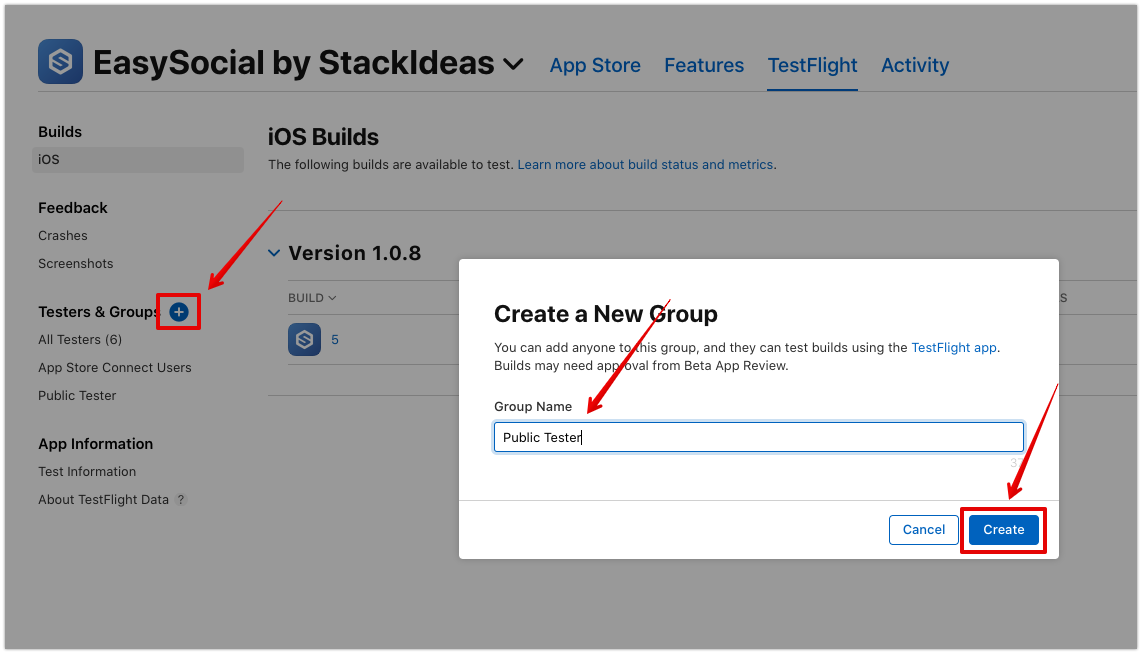
Once the group is created, go to the
Buildssection of the group page.Click on the
+sign in order to add the build to test.Choose the build that you want to test and click on
Next.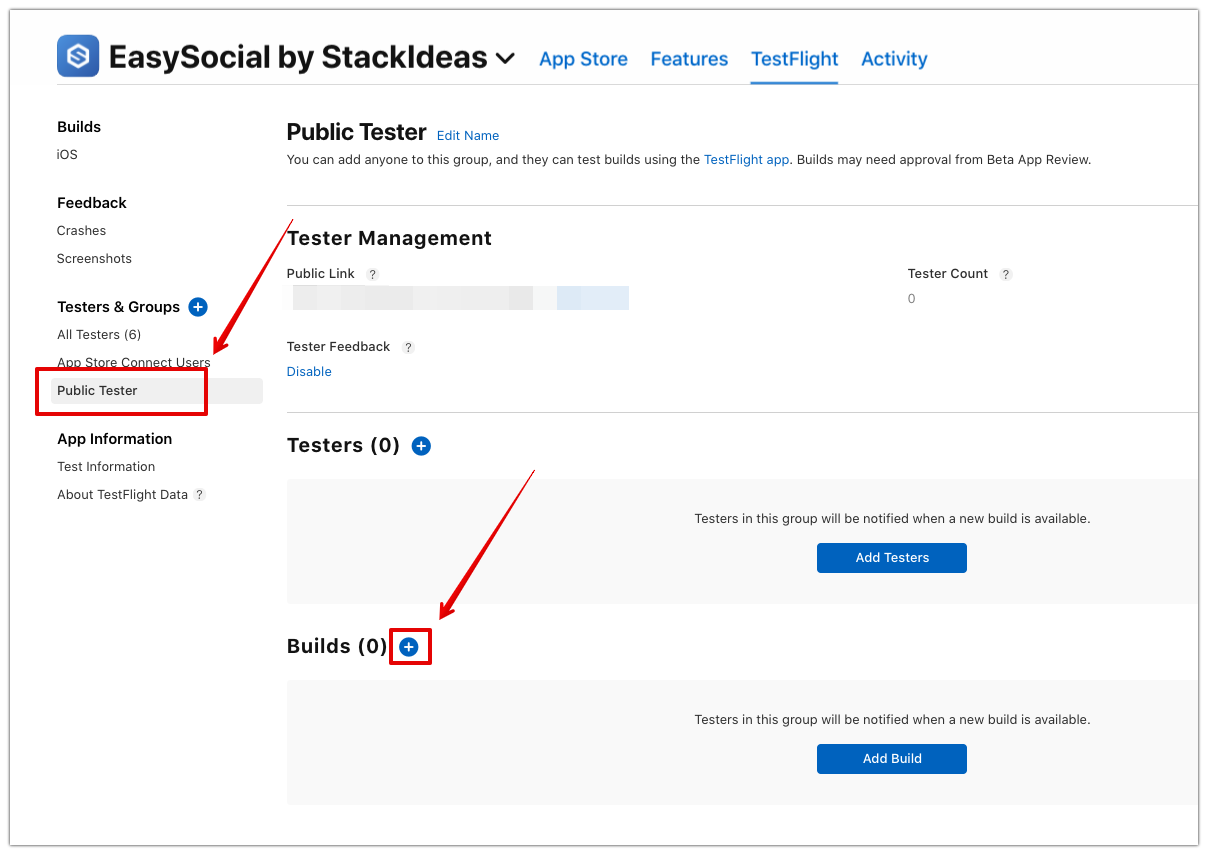

Fill in testing information form. Ensure that the
Sign-in requiredcheckbox is checked and fill in the tester account username and password. This is required as the app is restricted for registered user only. Click onNextonce everything is filled.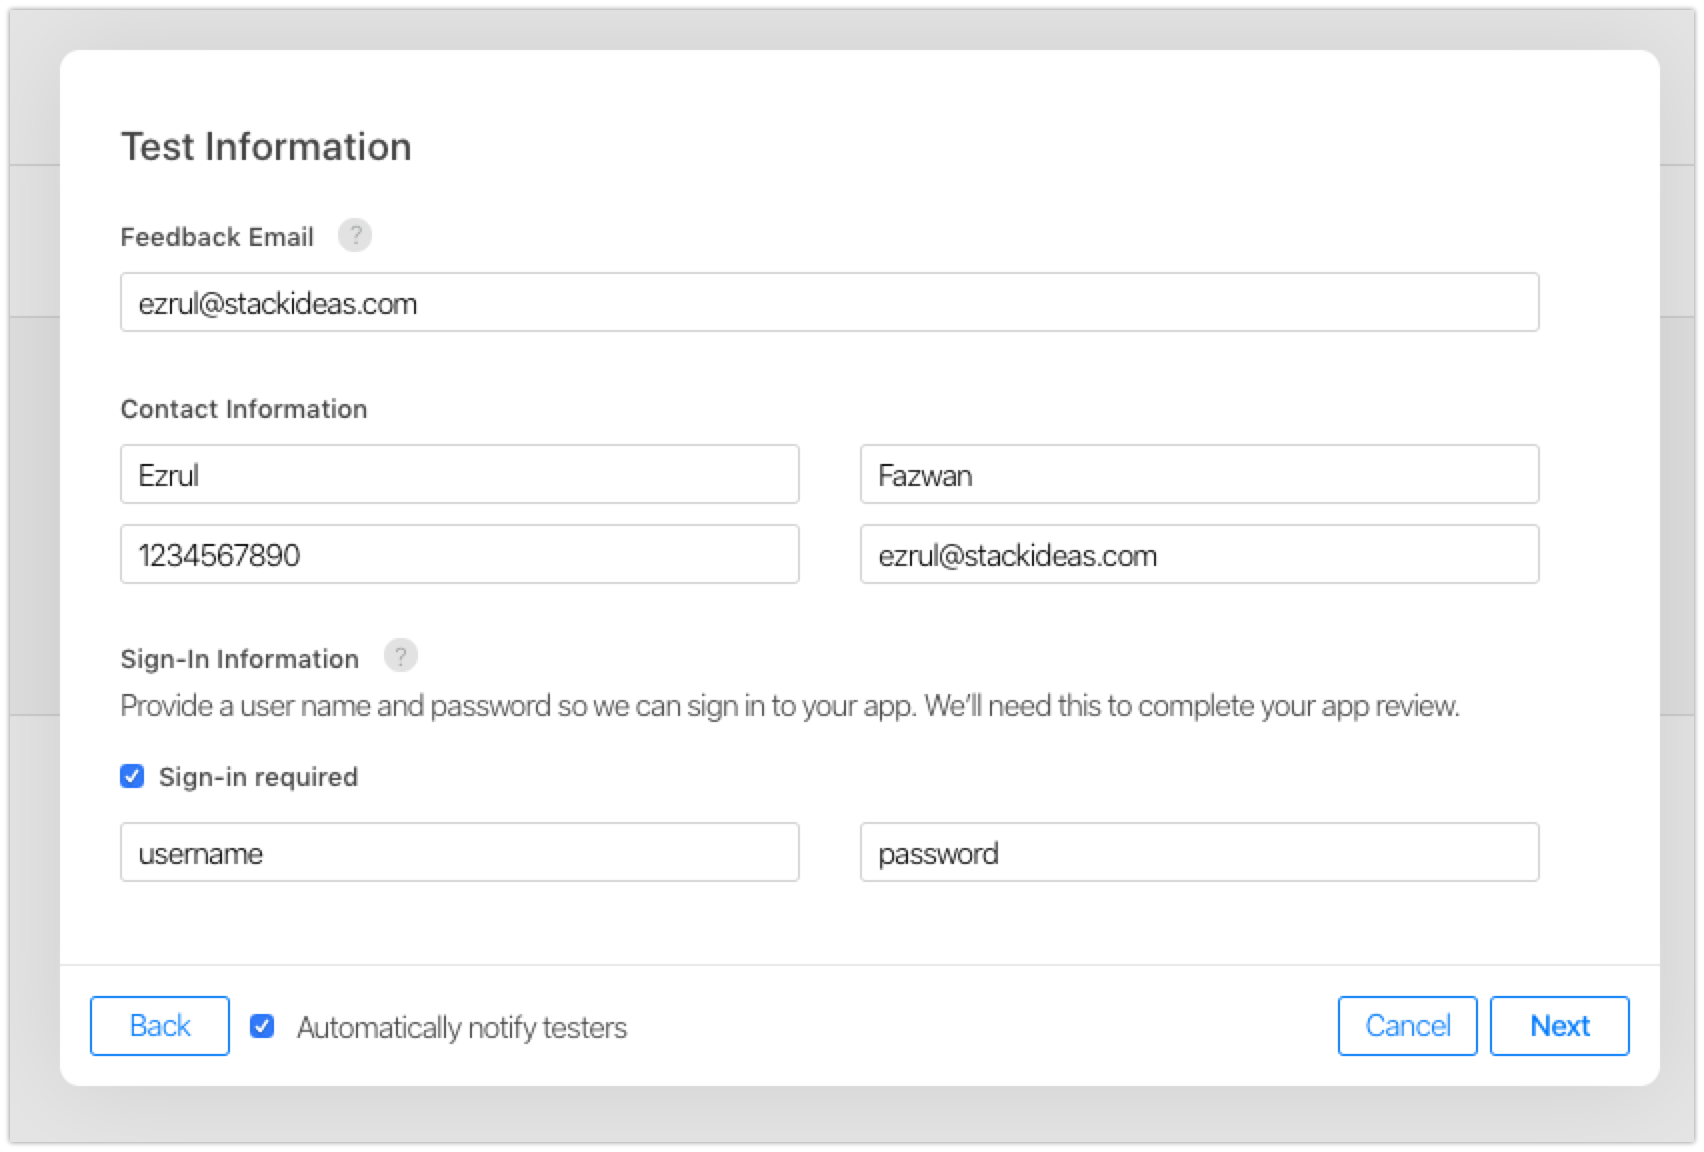
On this page, fill in the description of the app or the purpose of this testing. Once finished, click on
Submit for Review.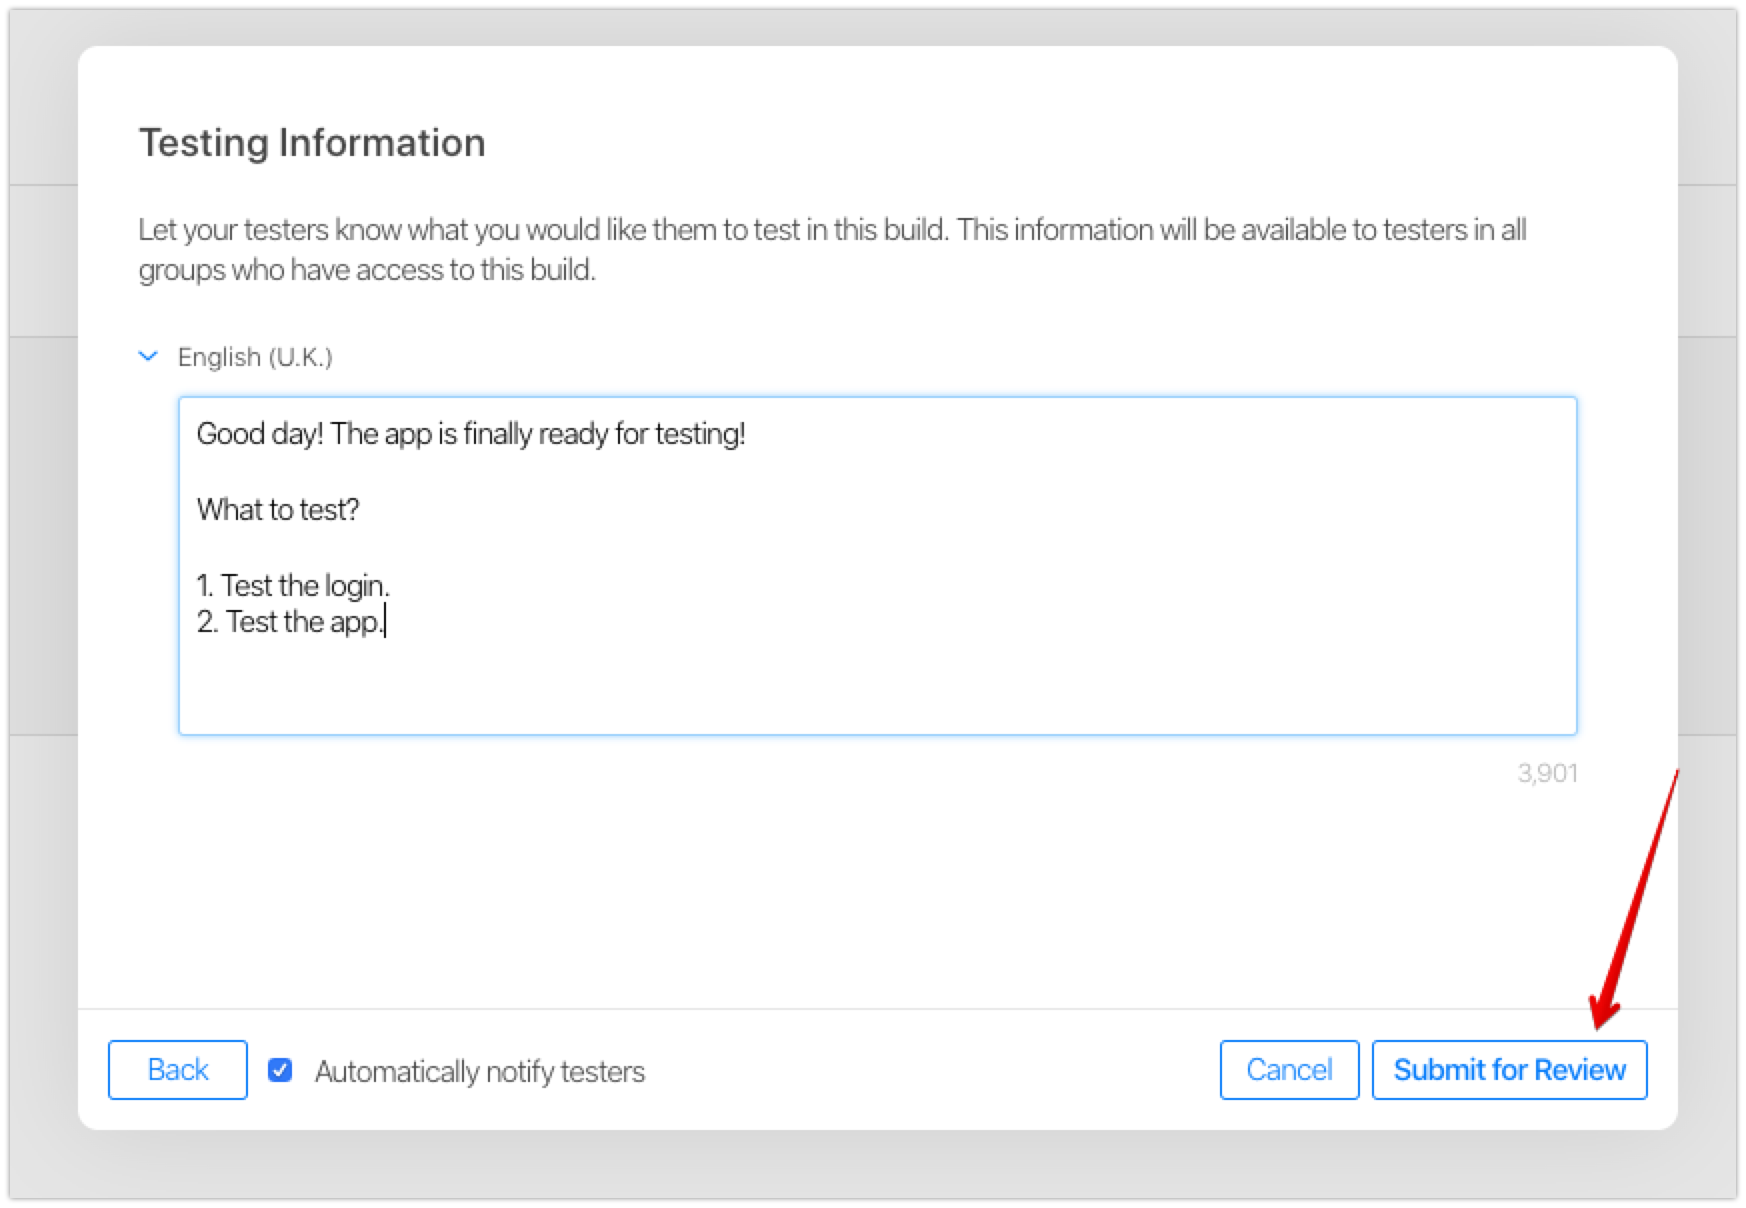
At this point, you will have to wait for the Apple to review the app and approve for testing. Once the app is approved, you should get notified via email and you may proceed to the next step.
Adding External Tester
Within the app, click on the group tester from the sidebar that you have created previously.
Go to
Testerssections and click on+sign .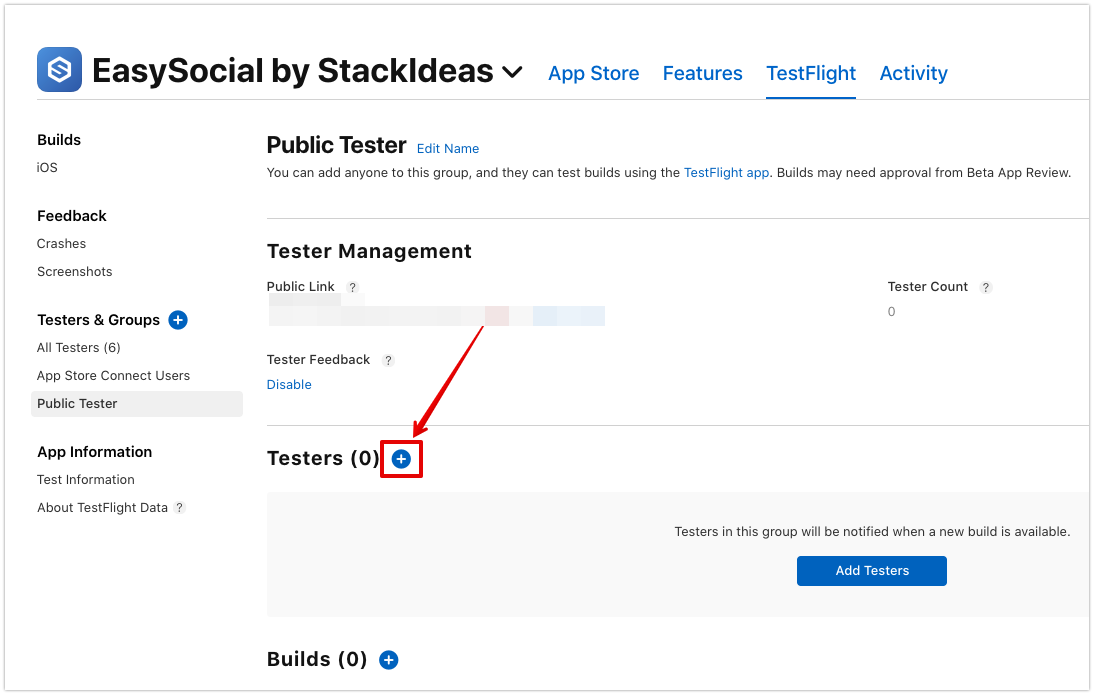
Enter the email and the name of the user and click on
Add.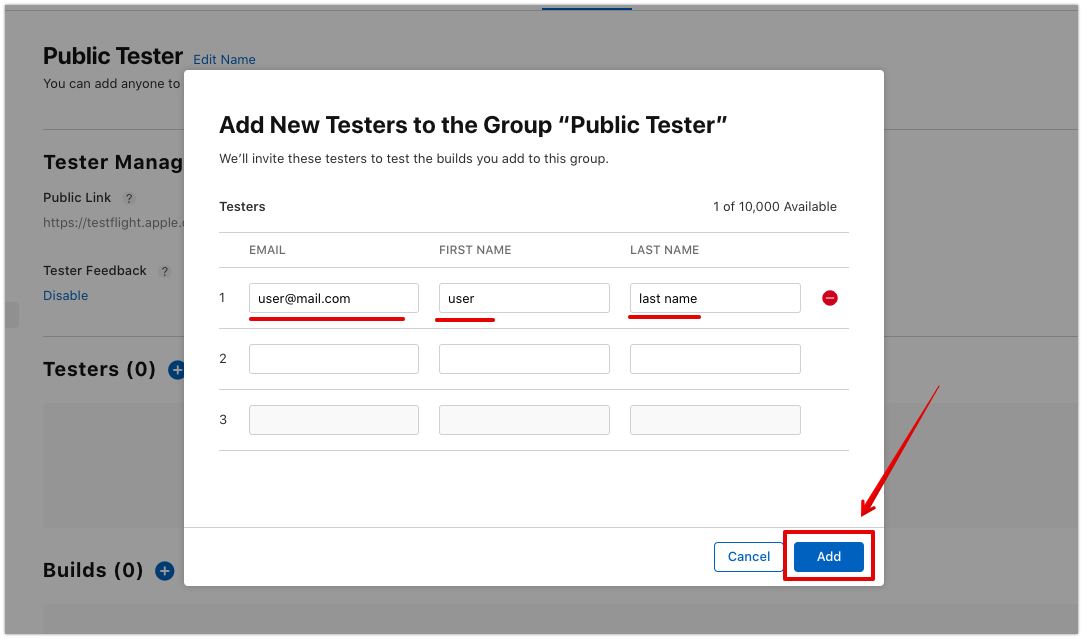
The selected users should be receiving emails together with the instruction on how to test the app using TestFlight App.