
Making EasyBlog Custom Fields Stand Out
I assume every EasyBlog user should already know how to display custom fields on a blog post, if not, not to worry. This post will show you how to create custom fields in EasyBlog, the basic of custom field styling and making it stand out just a little. So, without further a do, let's get started.
How to create custom fields in EasyBlog?
Step 01: Create Custom Field Group
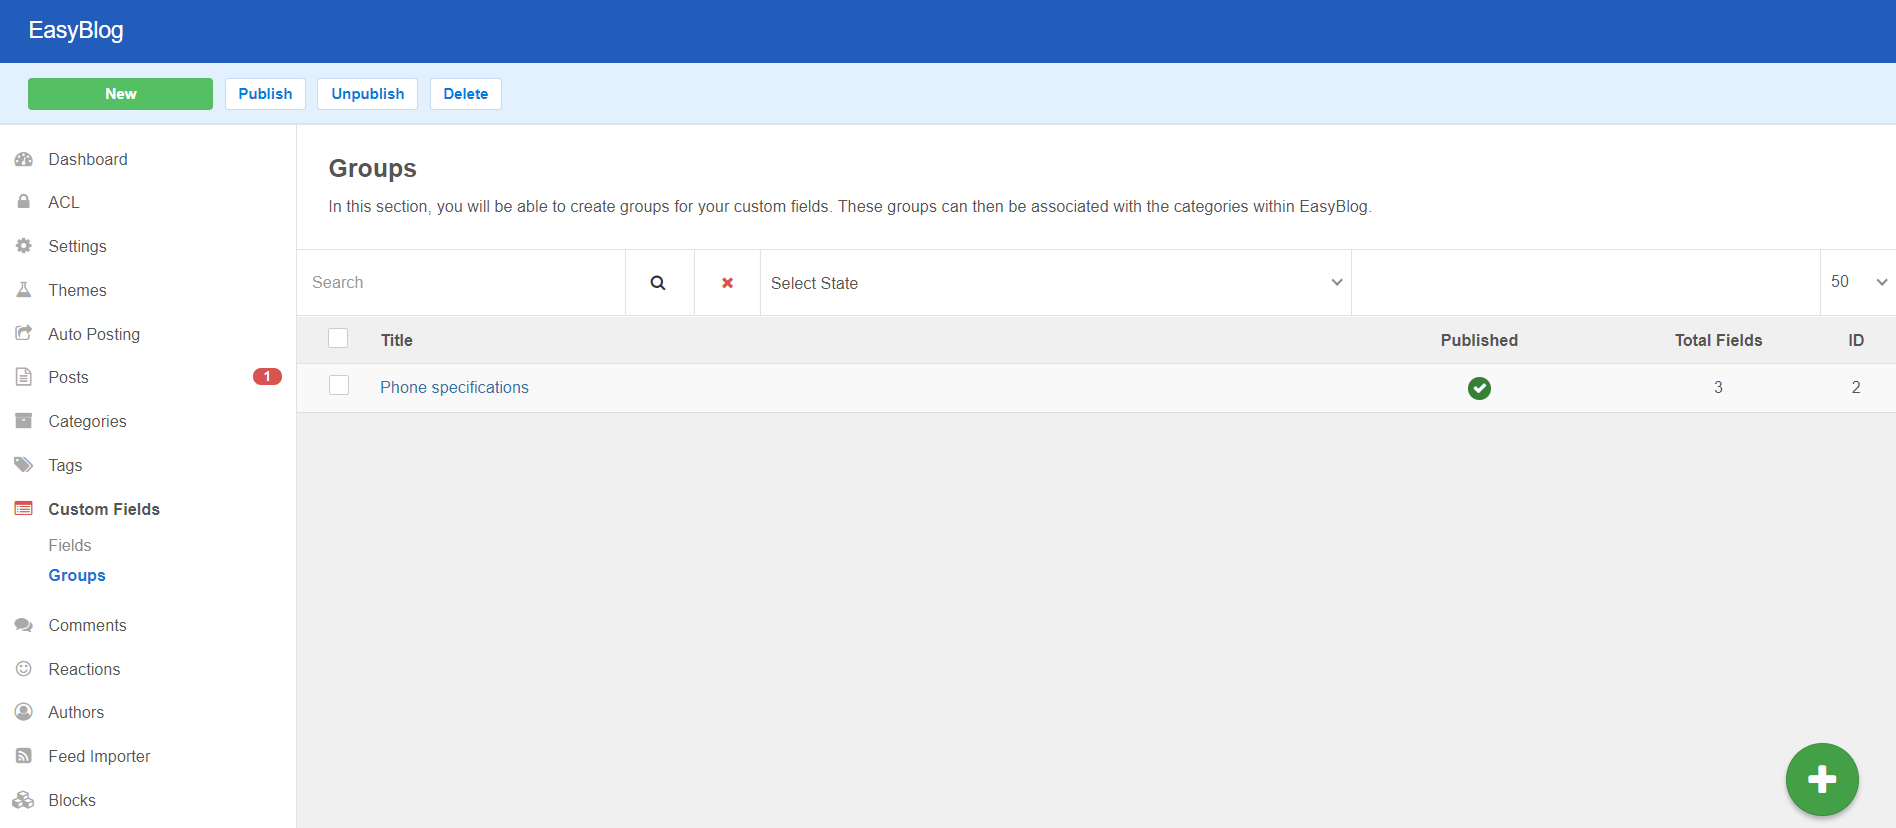
Navigate to your site Backend > Components > EasyBlog > Custom Fields > Groups.
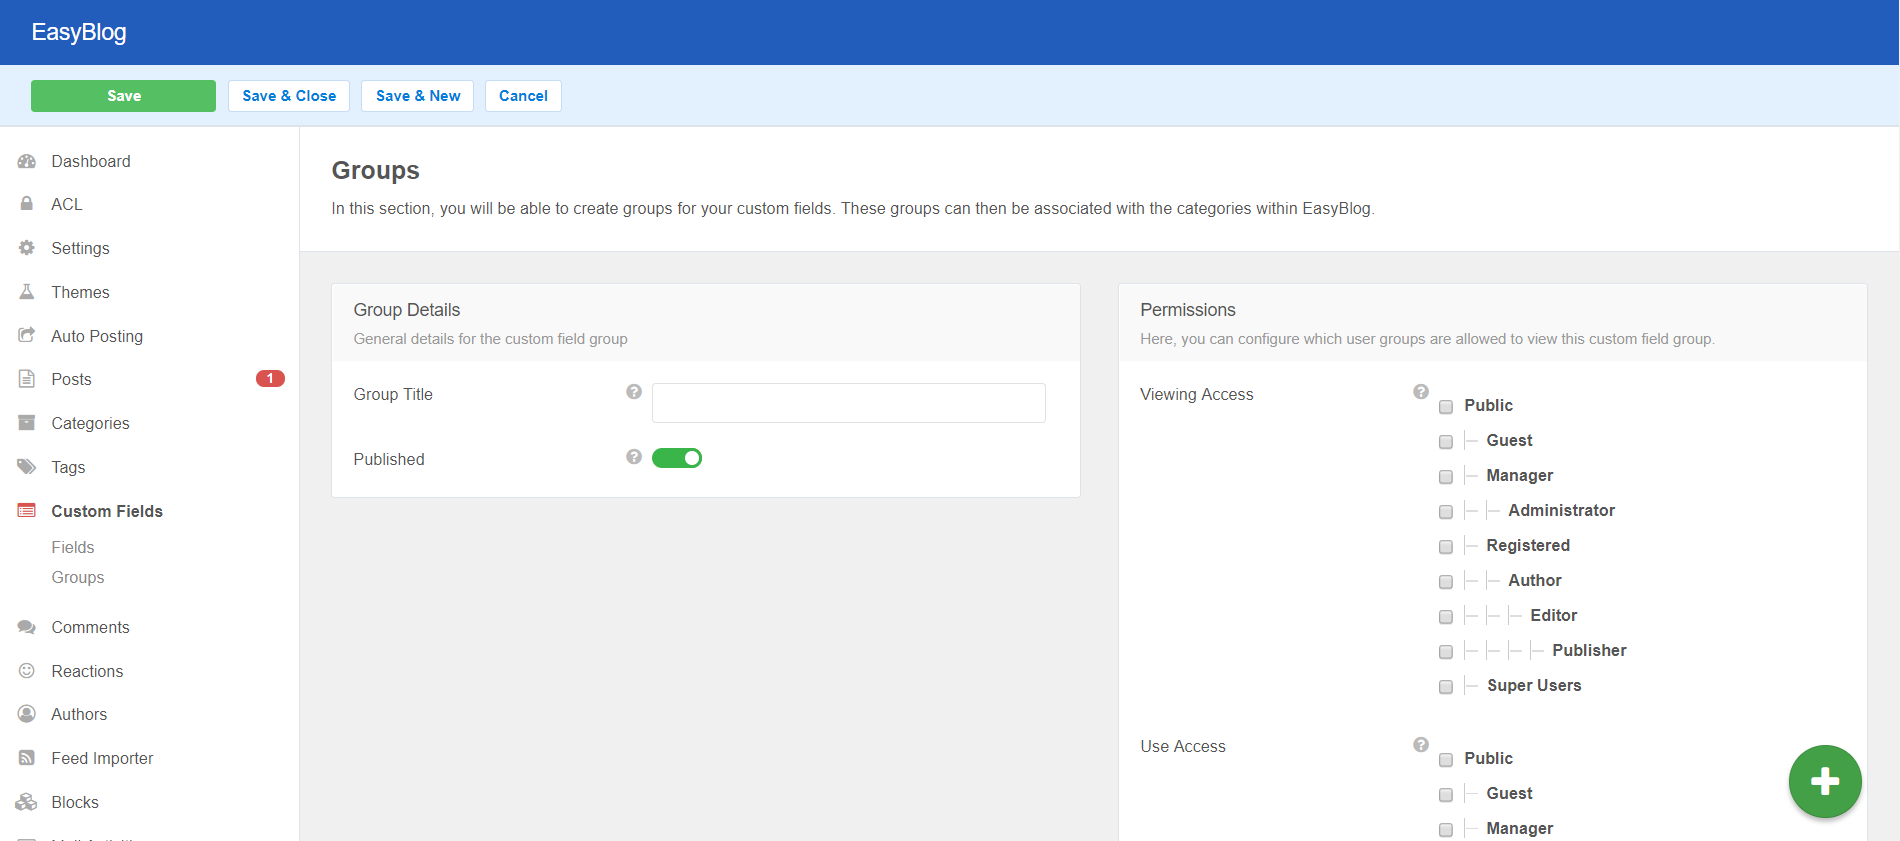
On this page, you have to click NEW button and enter your Group Title field then click Save.
Step 02: Create a new field
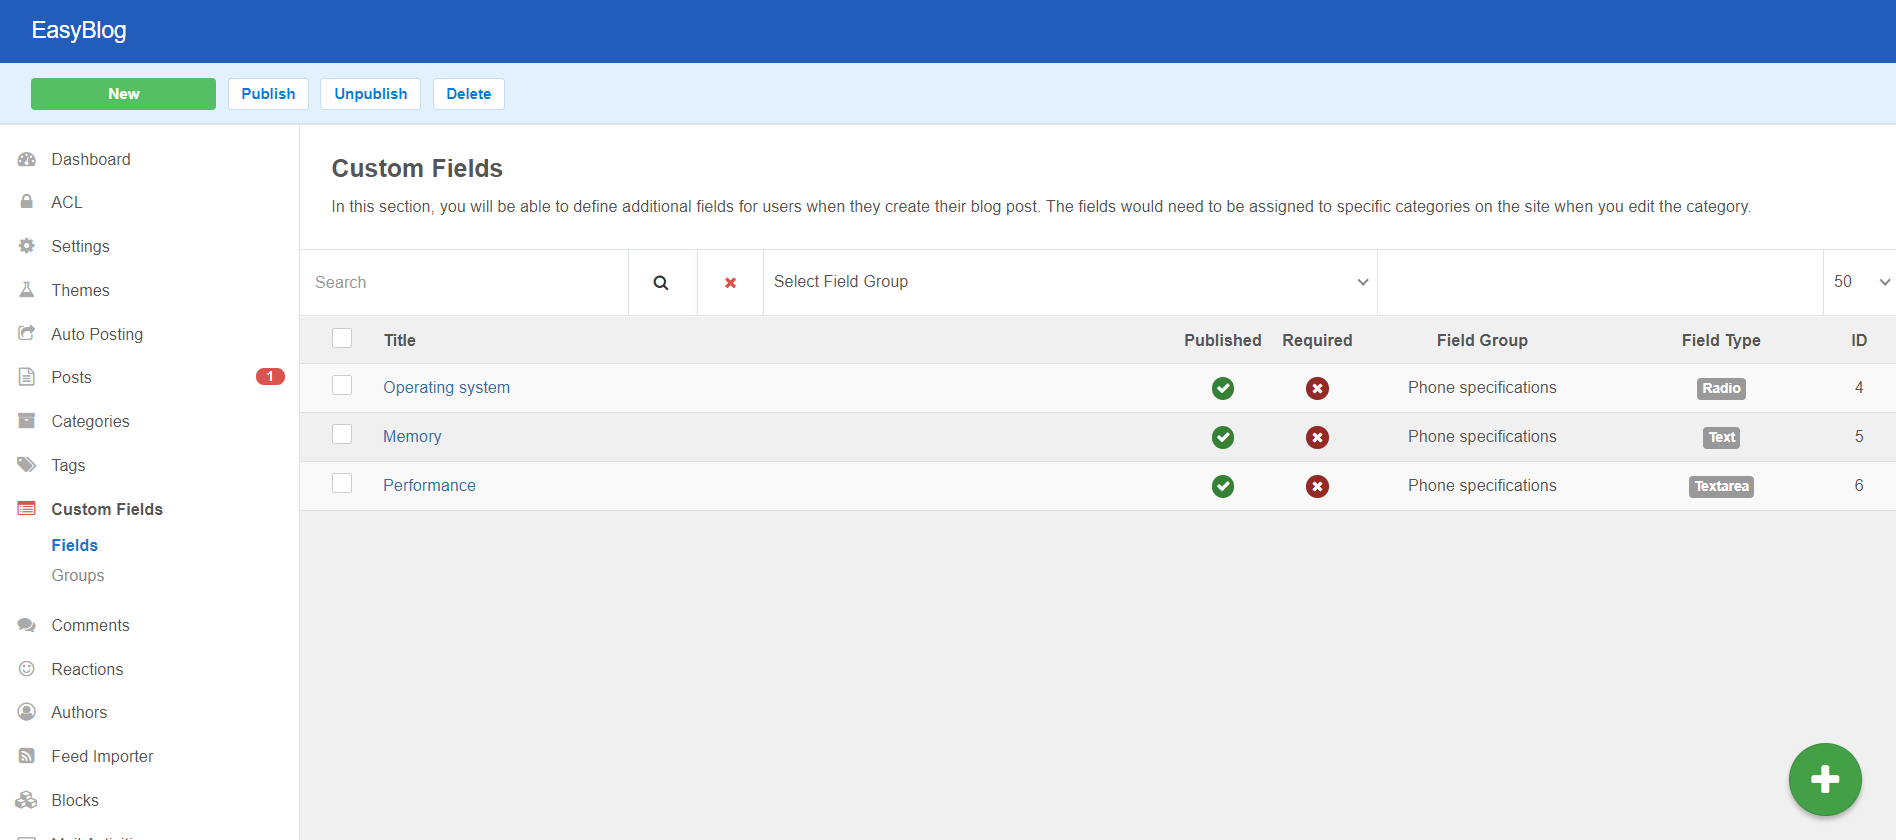
Once you have created the custom field group, navigate to Custom Fields > Fields > click NEW.
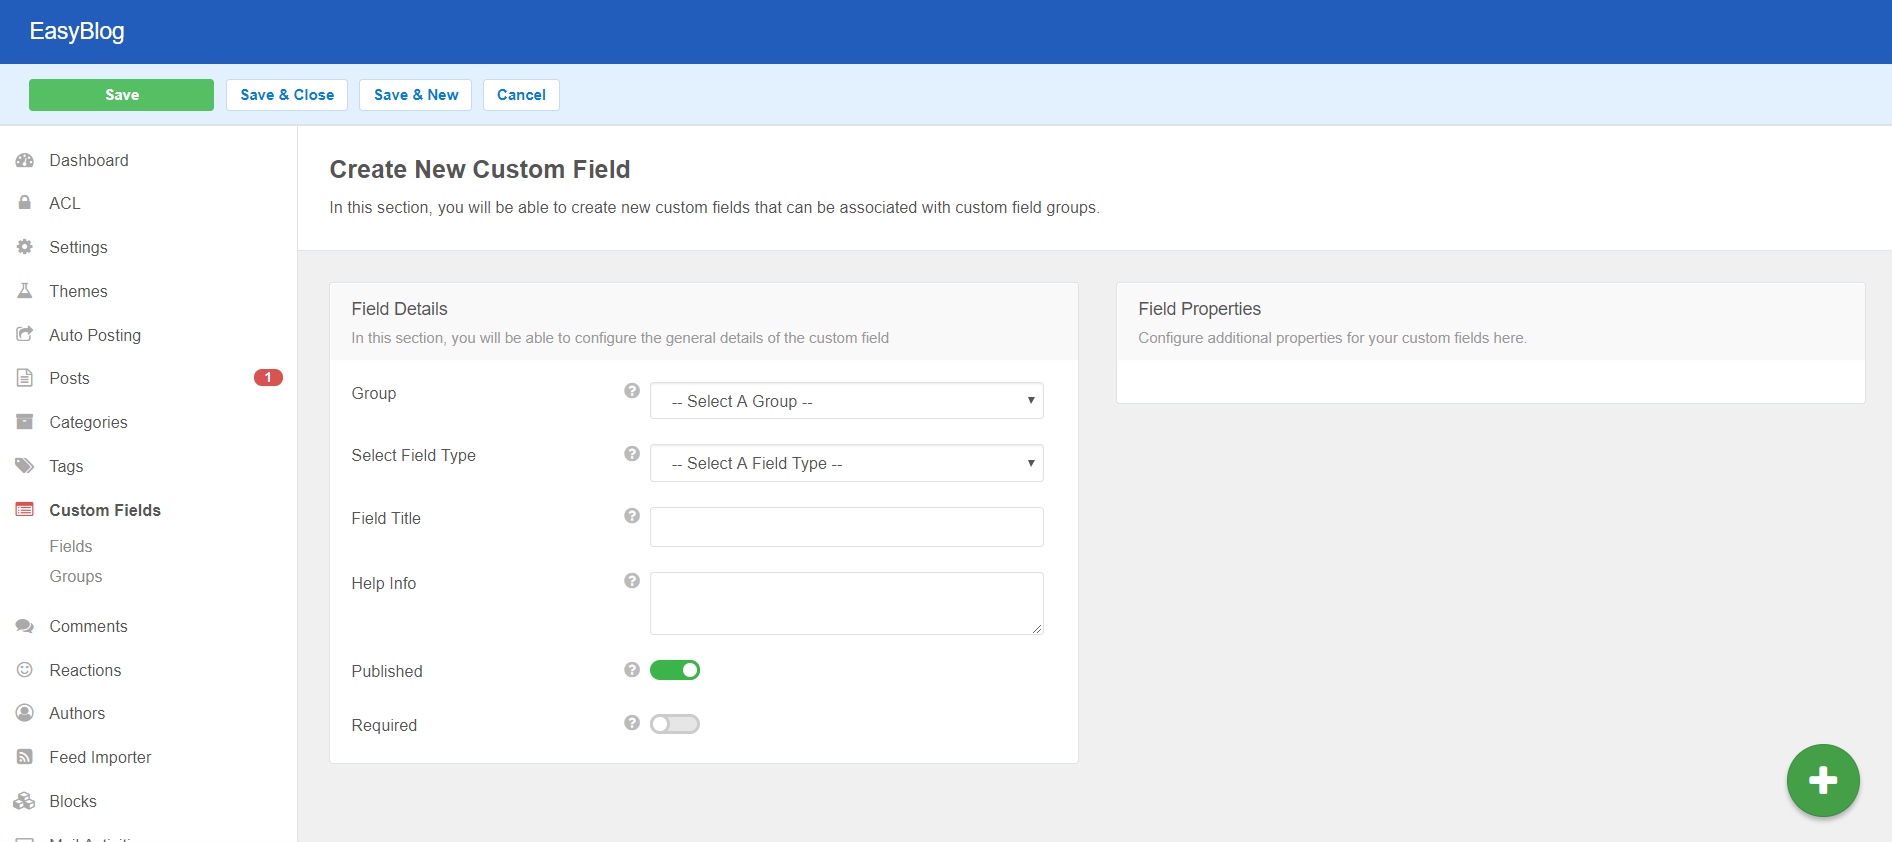
Add Group, select field type, field title, help info and etc.
- Group : Select group for this field which you have already created from Step 1.
- Select Field Type : Select which field type that you would like to display.
- Field Title : This field is used to display the field name.
- Help Info : Describe what field value you should enter.
Step 03: Add custom field display for categories
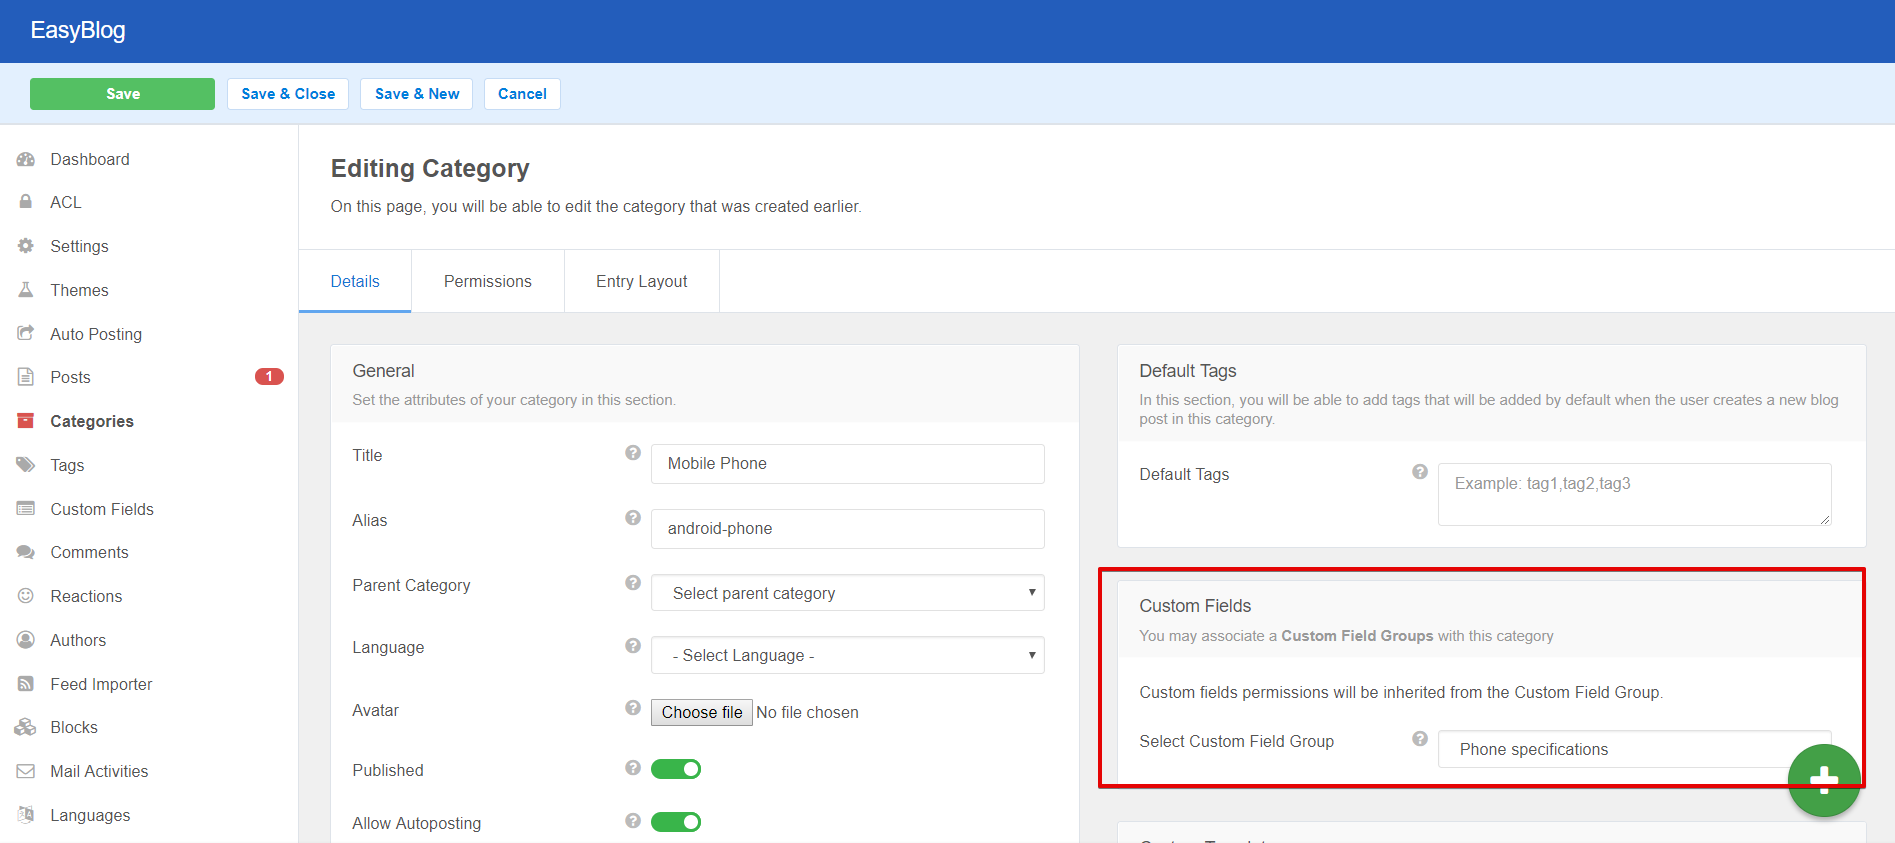
Navigate to your site Backend > Components > EasyBlog > Categories, then choose one of the category or create a new category. Now, select the custom field group that just you have created from Step 1 under Select Custom field group section, then click Save.
Step 04: Add custom field to your blog post
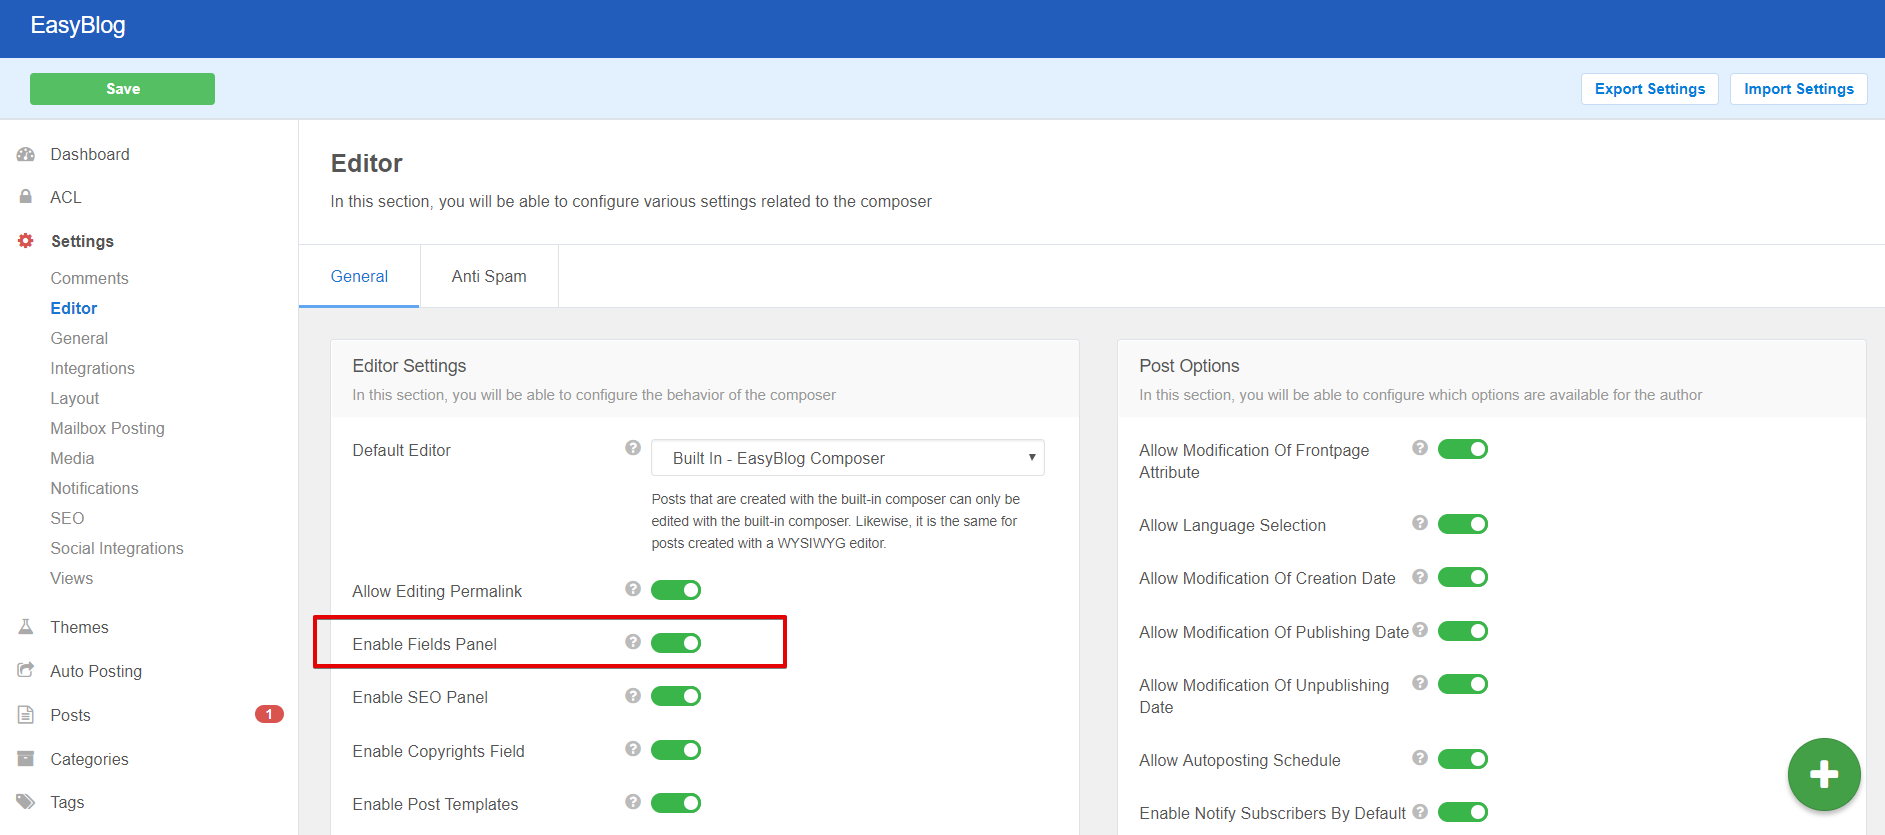
Moving on, ensure that this setting was enabled from Backend > EasyBlog > Settings > Editor > General > Editor settings > Enable Fields Panel - YES
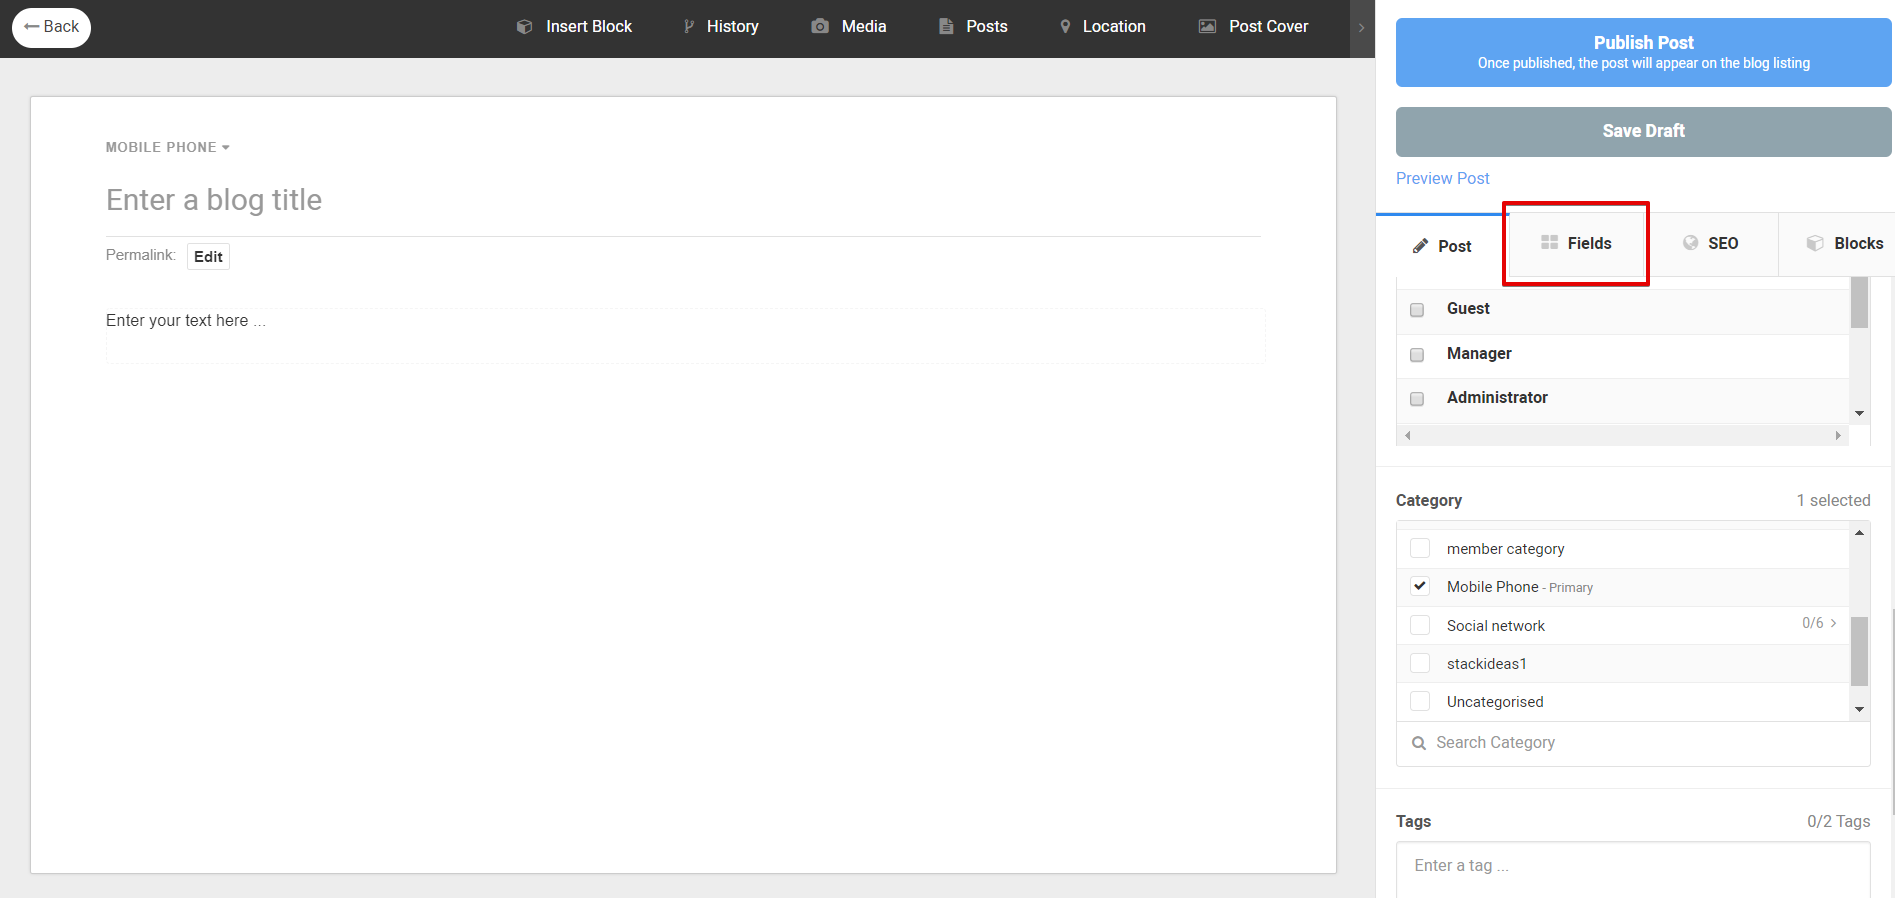
Then, open the composer and select the category, assign it to display for your custom field group. Once you've selected it, the fields tab section will display on the right.
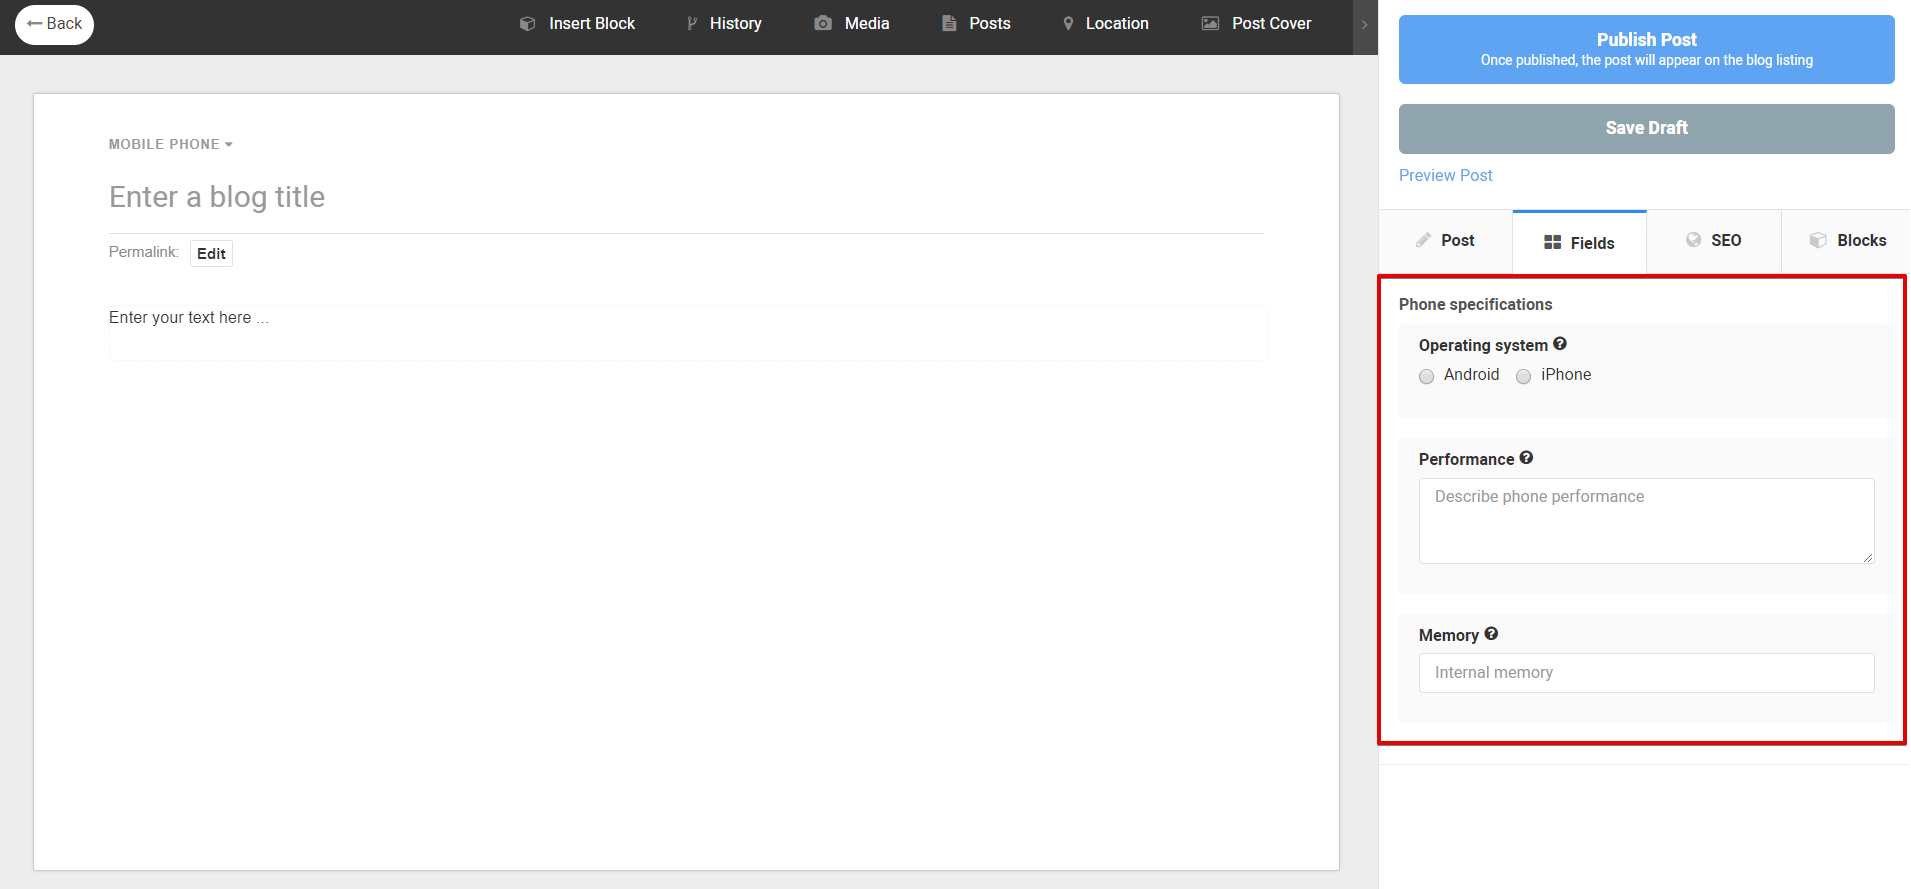
From there, user can now enter the necessary information under these custom fields at the tab section.
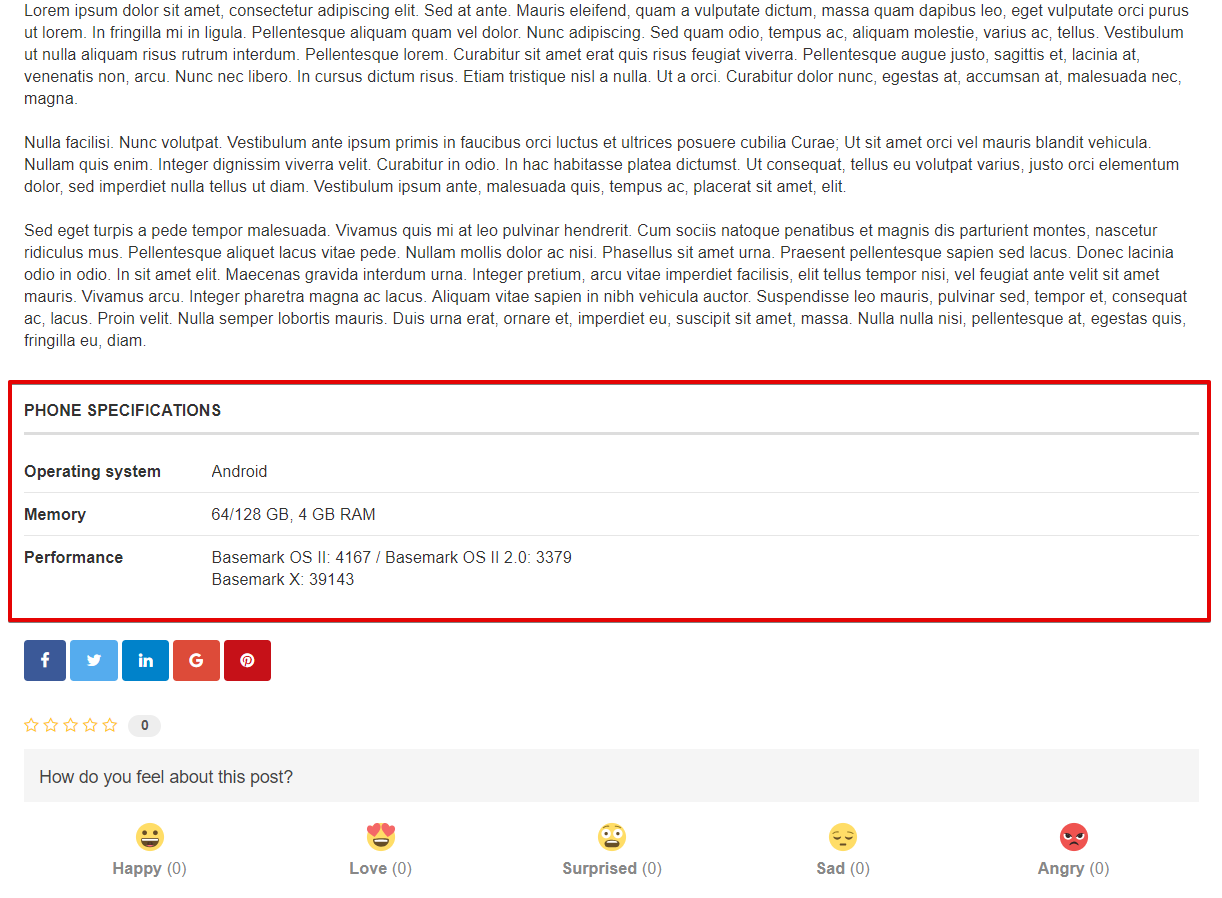
Finally, this is how it will look like on the blog entry page, the highlighted box shows the custom field section.
How to add styling to custom fields?

As for the final point, i will illustrate how a simple css can make your custom fields more appealing. To do so, add the CSS block code which define the font color into EasyBlog Custom CSS section.
As for the class name, you can use readable color names e.g. blue, green, and red. These color codes can be easily found at HTML Color Picker - W3Schools.
/* Add custom colour for custom field */
/* it will display blue colour for this custom field */
body #eb .eb-entry-fields .eb-fields-list .blue {
  color: #0000FF;
}

/* it will display green colour for this custom field */
body #eb .eb-entry-fields .eb-fields-list .green {
  color: #008000;
}

/* it will display red colour for this custom field */
body #eb .eb-entry-fields .eb-fields-list .red {
  color: #FF0000;
}
Now, copy the CSS codes above into the css custom section. With this, you can play around with the color name for your custom field section.
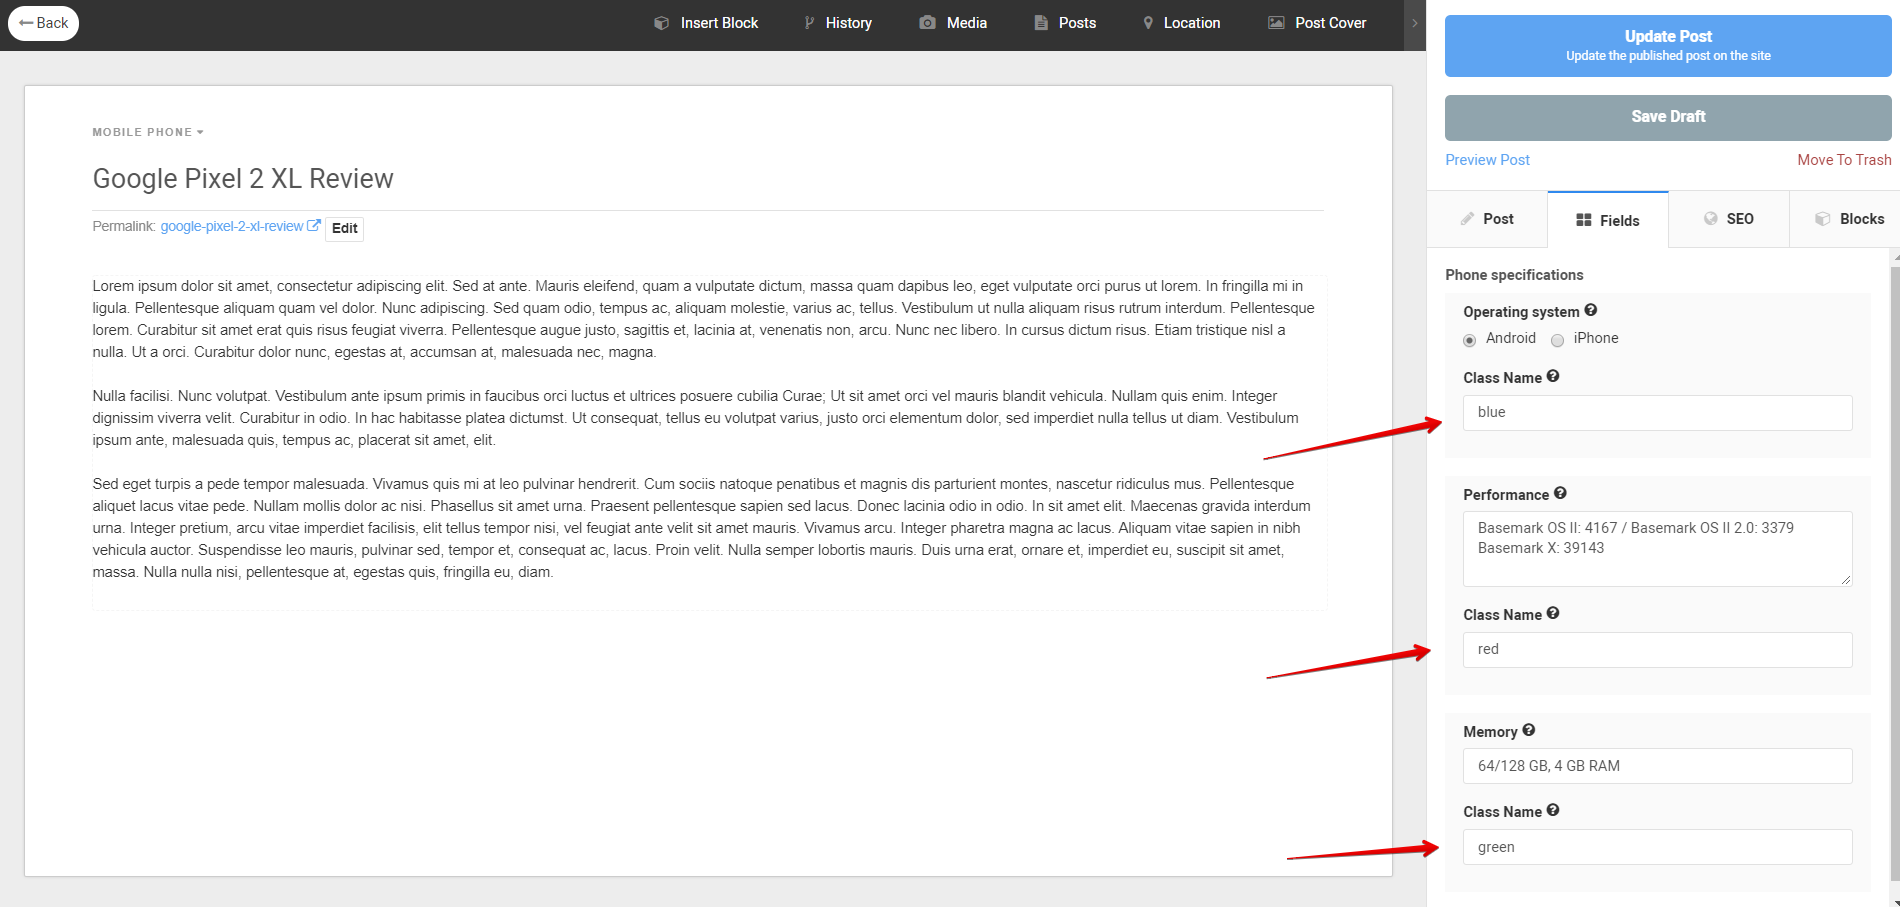
If you would like to display red color on certain custom fields, you can add the red color name for that custom field under Class Name field.
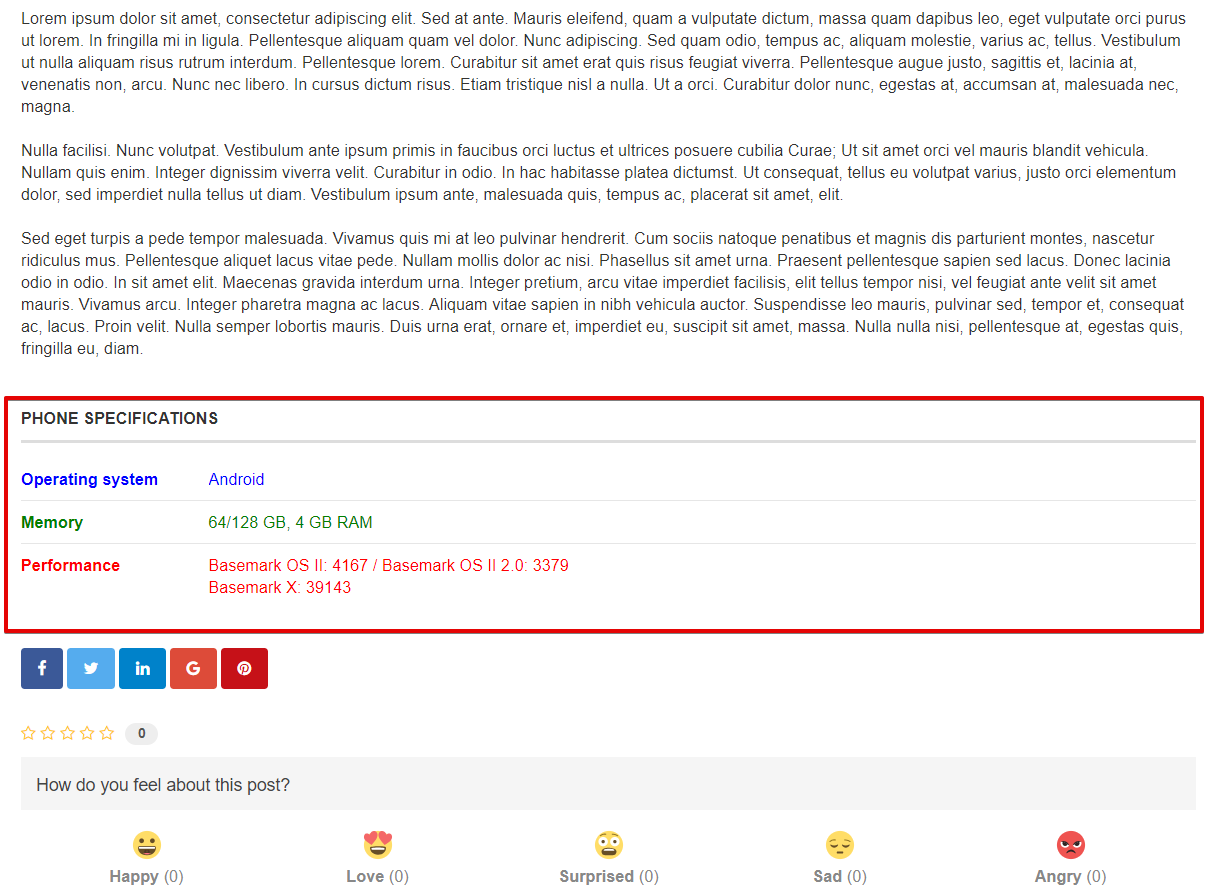
With the new styling codes already applied, the custom field section now looks different from before.
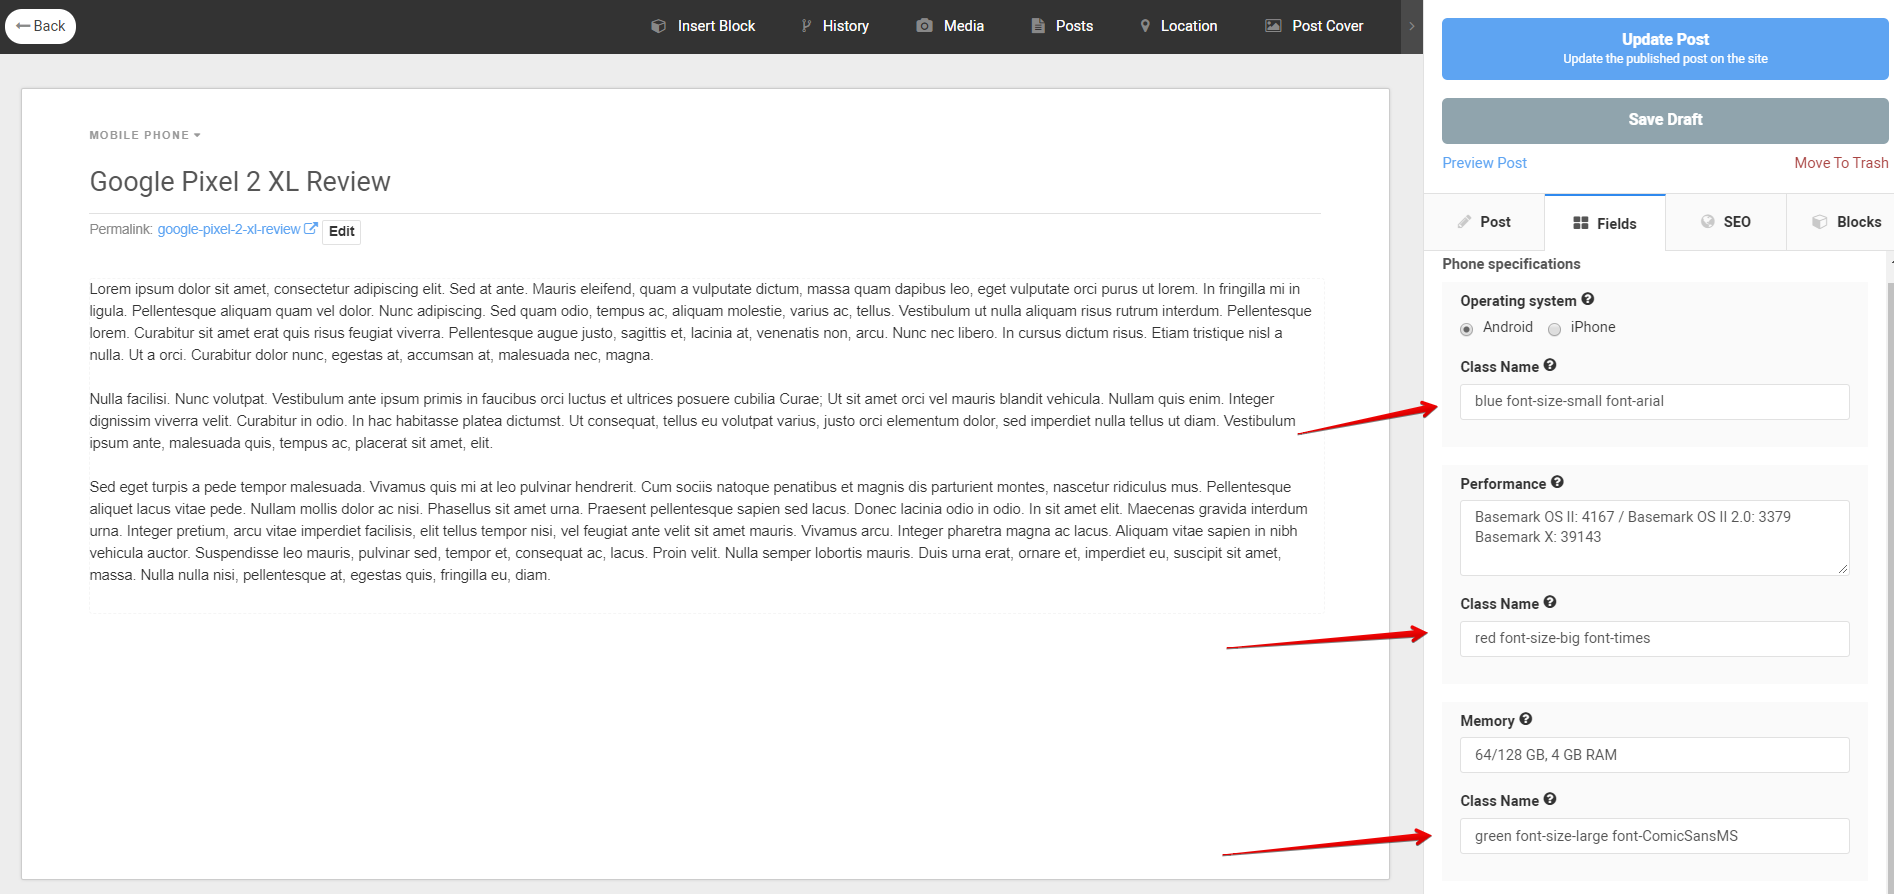
Other than that, you can also style the custom field font properties like font size, font family, font style and so on, as shown below.
/* custom font style for custom field */
body #eb .eb-entry-fields .eb-fields-list .font-arial {
  font-family: Arial;
}

body #eb .eb-entry-fields .eb-fields-list .font-times {
  font-family: Times;
}

body #eb .eb-entry-fields .eb-fields-list .font-ComicSansMS {
  font-family: Comic Sans MS;
}


/* custom font size for custom field */
body #eb .eb-entry-fields .eb-fields-list .font-size-small {
  font-size: 12px;
}

body #eb .eb-entry-fields .eb-fields-list .font-size-big {
  font-size: 25px;
}

body #eb .eb-entry-fields .eb-fields-list .font-size-large {
  font-size: 18px;
}

There you have it. Custom field is very powerful feature but more importantly, you have the flexibility to use it however you see fit.