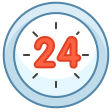
Response Time
24 — 48 hours


Administration and Customizing Your EasySocial Network - Making changes to the Activity Settings and the Alert Settings.
With EasySocial you can do some configuration and customization in the Dashboard Administrator to make your social network feel more like your own. Learn how to configure your EasySocial powered social network to match your website or organization's needs.
This Help Guide is designed for individuals or organizations in the early stages of developing their social community; newcomers to community administration and management; those who need to understand community management to develop policies or procedures; and community managers who need to revitalize a stalled community.
Welcome to EasySocial! Ready to dig into the EasySocial Administrator Dashboard to set up your social network?
This guide details the special administrative privileges available exclusively to paid customers like yourself. As an EasySocial administrator, you now have access to a robust suite of tools designed to help you configure and manage your social network. You can enable and disable features, integrate EasySocial with other Joomla Extensions, applications, provision and deprovision users, monitor activity, export data and more. This guide is just the beginning -- as you get started, keep in mind your designated StackIdeas Customer Support Team and other members of this community are always here to help.

1. Activity Logs Settings - This is where you will set the Pagination for the Backend Limit and the Frontend Limit for the user activity logs.
To access the Activity settings go to: Joomla Administrator > Components > EasySocial > Settings > Then click on Activity Logs, and this will show you the Activity Log settings.

Pagination:
Backend Limit: - Set the maximum number of activity logs to retrieve when editing a user.
The default value is set to 5.
Frontend Limit: - Set the pagination limit on the maximum number of activity logs for the user to displayed in the frontend on the site.
The default value is set to 10.

To access the Alerts Settings go to: Joomla Administrator > Components > EasySocial > Settings > Then click on Alerts, and this will show you the Alerts settings.
2. Alerts: Live notifications appears in the toolbar by updating your user in real time whenever there are updates for their account.
General Notification settings:

Pagination: Set the number of notification items to display on the pagination page layout.
The default value is set to 10.

System Notifications:

Enable system notification: - By turning this option on, system notifications will be enabled on the site. It automatically polls for new system activity and alerts the user with an activity counter.
Polling interval: Set the polling interval for system polling. On a huge site with lots of users and activity it would be advisable to set it to between 30 and 60 seconds.
Friends Notifications:

Enable friend notification: By turning this option on, the system will display a friend request counter by polling the server at a specified interval.
Polling interval: Set the polling interval for system polling. On a huge site with lots of users and activity it would be advisable to set it to between 30 and 60 seconds.
Conversation Notifications

Enable conversation notification: By turning this option on, the system will poll the system for new conversations and display a counter when there are new conversations.
Polling interval: Set the polling interval for system polling. On a huge site with lots of users and activity it would be advisable to set it to between 30 and 60 seconds.
3 Replies
The replies under this section are restricted to logged in users or users with an active subscription with us