I Blog With Joomla: Installing Joomla 3
Congratulations for setting up your virtual space with the right domain name and chosen the preferred web hosting service based on the previous blog posts we did.
Now is the part where the heart of the website plays the most important role -- the Joomla engine. Without Joomla, you are not able to set up the blog and start your blogging business.

Setting Up Your Joomla Website
There are many ways to install Joomla and it really depends on how familiar you are when dealing with the technical aspects of it. Well, it doesn't take a rocket scientist to install Joomla, really. You can install Joomla with a pre-loaded software provided by your hosting company or do it the manual way, which we will be the highlight of this blog post.
In a nutshell, here are the steps that you will go through when installing Joomla 3 to your web hosting:
- Technical requirements
- Download Joomla to install
- Installing Joomla
- Database configuration
- Complete installation
1. Technical requirements
Firstly, do ensure that your web hosting account fulfills the following minimum hardware requirements to support Joomla 3:
- PHP 5.3.1
- MySQL 5.1
- MSSQL 10.50.1600.1
- PostgreSQL 8.3.18
- Apache 2.x
- Nginx 1.1
- Microsoft IIS7
The web hosting services offered by SiteGround and CloudAccess should be more than enough to support the above requirements so if you have choosen either providers, you are in safe and secured hands.
2. Downloading Joomla

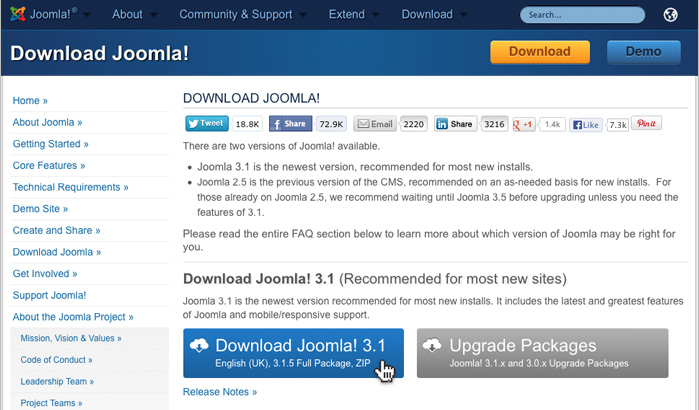
Joomla is free to download and it is better to download from their official website. Make sure you download the version that says "Recommended for most new sites" and you are on track. The filename will be identified as Joomla_3.1.1-Stable-Full_Package.zip. You will then need to configure the database for Joomla to install in and to access your database. If you are not sure how to go about finding the MySQL database, you can contact your hosting provider.
To configure, make sure these details are specified:
- Database name
- Database username and password
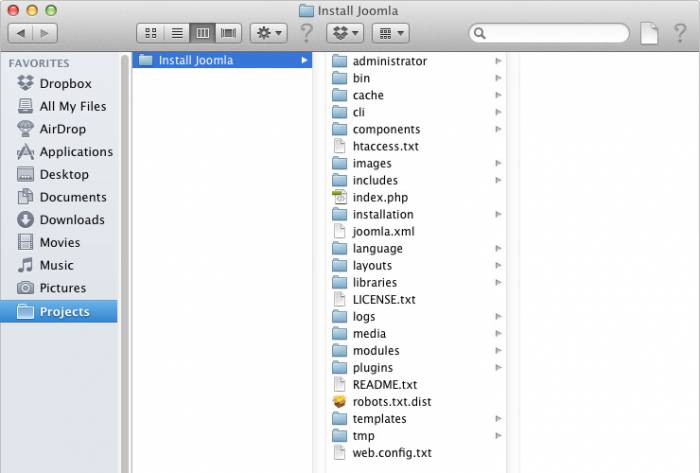
You can also refer to the details on creating a database in Joomla. Next, upload the Joomla installer into your web server using a FTP and unpack it by unzipping the contents of the folder.
3. Installing Joomla

Upon completing the configurations of your web server and uploading the Joomla installer in your web server, head on to the frontend of your website http://yourwebsite.com and you will see the installation screen as shown in their guide.
4. Database configuration

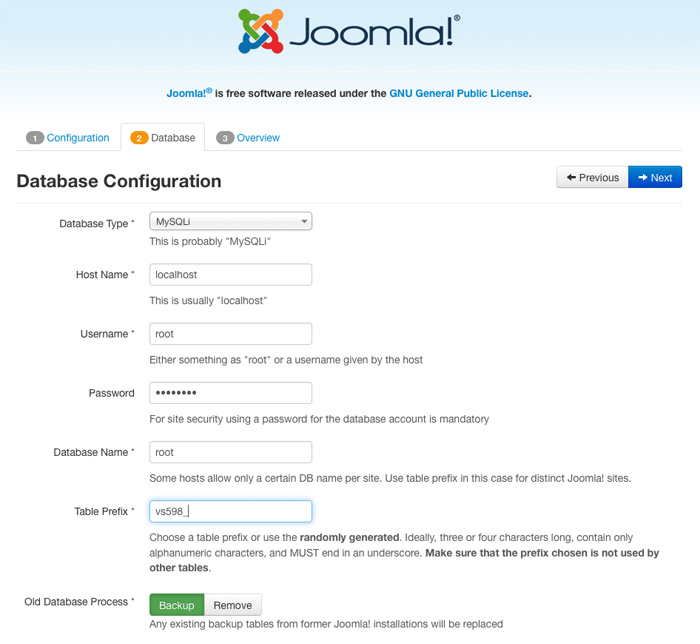
Here, you will specify the server details that you had already created in Step 2. Be sure that the details are the same as when you first configured your server. Here, you will also specify the login details such as the username and password, which you will use to login later for further work.
In the next installation screen, you have the option to also install sample data into your new Joomla website but in this blog post about starting a blog, these sample data is not required as you will be composing your own blogs in the near future. If you need to edit any of these details, you can still do so after the installation in the backend Administrator area under the Server options.
5. Complete installation
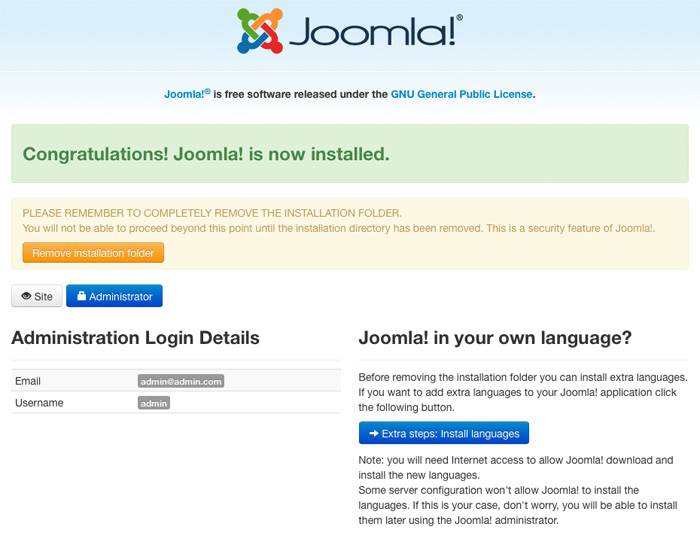
Before the end of the Joomla installation, you will see a summary of all the configurations and settings you had done in the previous steps. If everything satisfies you, go ahead and click on Install at the top right corner of the screen. You will see a progress bar until the successful installation message is shown. Before you could start using the site, you will need to perform the final step of deleting the Installation Folder. Just click on Remove Installation Folder and it will work its course.

Congratulations, you have just activated your site with Joomla!
Access to Your Joomla Administrator Area
This part will be the key area where your Joomla blog starts as the installation of supporting extensions and plugins are done here. To login to your website control panel or administrator area, add in the /administrator at the end of your domain eg. http://yourwebsite.com/administrator and you will arrive to the login form. Use the same login credentials that you had created in Step 4 above to access this area.
Installing Joomla from Your Web Hosting Software
Here are some videos you can refer to that can help you if the learning curve of installing Joomla seems steep to you.
- How to Install Joomla with Softaculous?
- How to Install Joomla with cPanel? (VIDEO)
- How to Install Joomla with QuickInstall?
There you have it, your own Joomla website, done!
As we are just a few steps away to set up the blog in Joomla, in the next blog, we will dress up your Joomla site with beautiful Joomla templates.
To Be Continued