Hassle-free Revisions With EasyBlog
One of the feature we have introduced in EasyBlog was the ability to utilize blog revisions. Keeping a history of changes which make switching between revisions back and forth in a breeze.
Configure the settings
Head on over to EasyBlog back-end settings:
- Click on Settings > Editor > General > Enable revisions

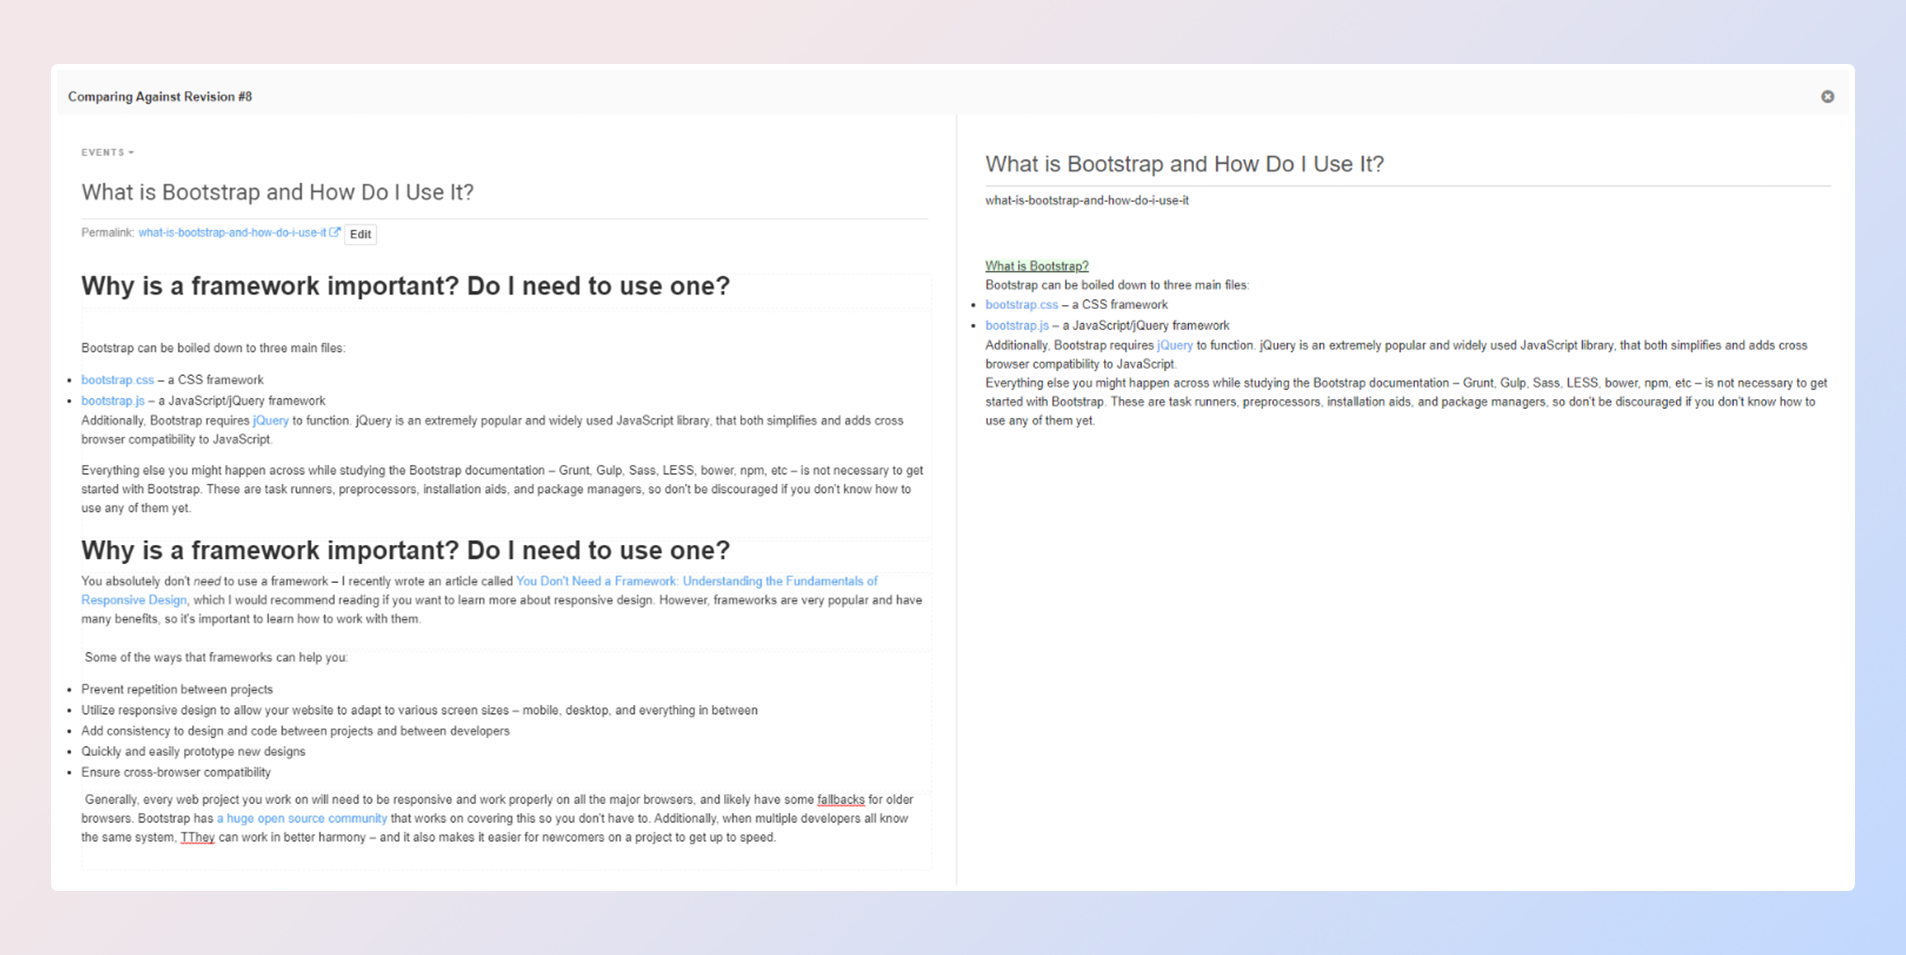
As you can see, once you enabled this setting, this nifty function allows you to compare your previous work history against the current blog side by side, that way, you can quickly glance through your changes easily.

Not to mention, you can also preview the current revision with a click of a button, however do make sure that you've already logged in at the front-end beforehand.
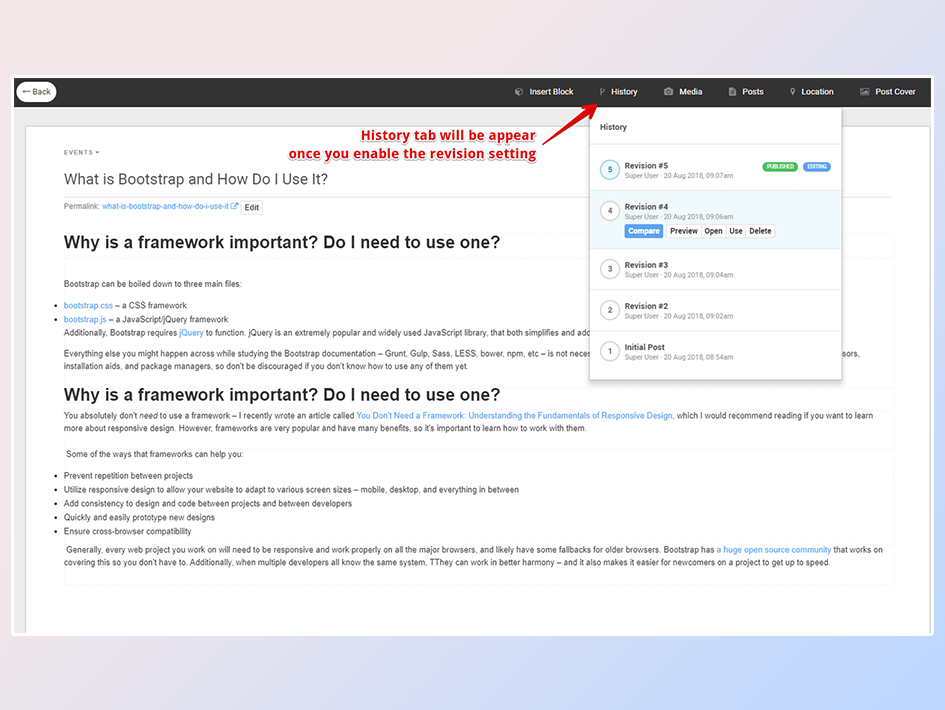
Apart from that, if you would like to edit the previous revision, you can always click on the Open button and continue on editing the blog post. Likewise, you could also delete any revisions from the history dropdown settings as well.
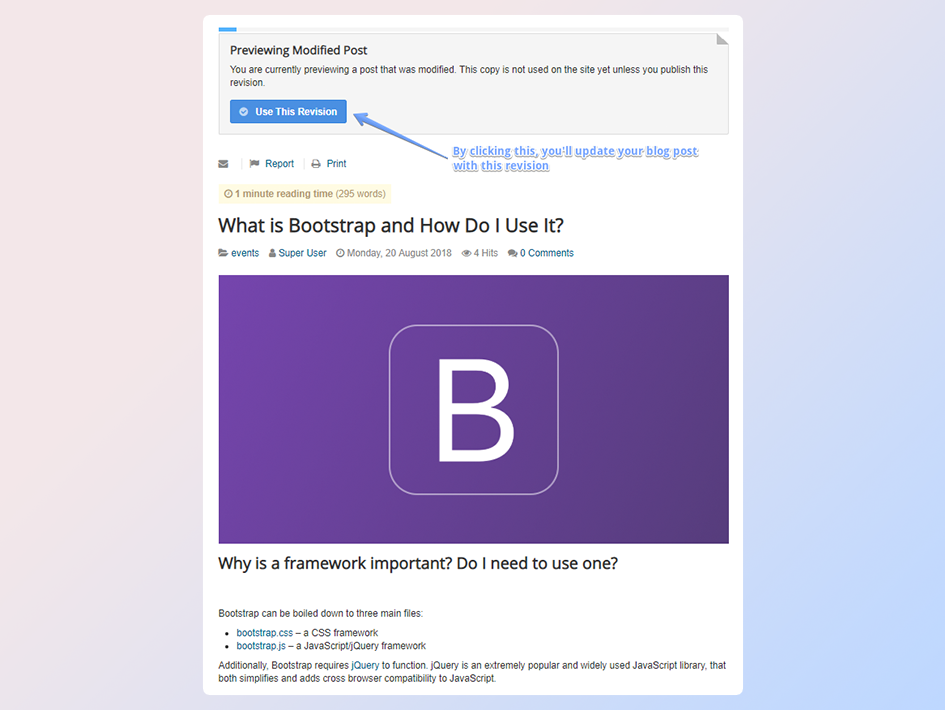
Last but not least, once you're satisfied with the final draft, you actually can publish the revision directly by clicking on the Use This Revision button found at the dropdown or while previewing it.