EasyBlog Composer Custom Blocks
Creating a custom block for EasyBlog composer is not hard, but you'll need some coding skills to begin with.
Building Custom Block
Your custom block zip package should contain the following files.
blockname.json
Designated path: /administrator/components/com_easyblog/defaults/blocks/blockname.json{ "group": "media", "element": "custom", "title": "Custom Block", "description": "Custom block description", "keywords": "custom", "published": 1, "ordering": 100 }blockname.js
Designated path: /media/com_easyblog/scripts/composer/blocks/handlers/blockname.jsEasyBlog.module("composer/blocks/handlers/custom", function($){ var module = this; EasyBlog.require() .done(function($) { EasyBlog.Controller("Composer.Blocks.Handlers.custom", { elements: [], defaultOptions: {}, }, function(self, opts, base, composer, blocks) { return { // Your js file can contain any scripts that required by the block. }}); module.resolve(); }); });blockname.php
Designated path: /administrator/components/com_easyblog/includes/blocks/handlers/blockname.php
(Your custom block must extends the parent class with the necessary abstract methods)<?php defined('_JEXEC') or die('Unauthorized Access'); require_once(__DIR__ . '/abstract.php'); class EasyBlogBlockHandlerBlockname extends EasyBlogBlockHandlerAbstract { public $icon = 'fa fa-file-image-o'; public $element = 'none'; public function data() { $data = new stdClass(); return $data; } }blockname/fieldset.php
Designated path: /components/com_easyblog/themes/wireframe/composer/blocks/handlers/blockname/fieldset.php
(Generates the fieldset on the right)<?php defined('_JEXEC') or die('Unauthorized Access'); ?> <!-- You may define any options here. -->blockname/html.php
Designated path: /components/com_easyblog/themes/wireframe/composer/blocks/handlers/blockname/html.php
(Generates the temporary html codes when a block is added into the content)<?php defined('_JEXEC') or die('Unauthorized Access'); ?> <div class="eb-composer-placeholder eb-composer-placeholder-custom"> <p>custom block</p> </div>- blockname/
Designated path: /components/com_easyblog/themes/wireframe/composer/blocks/handlers/blockname/
(For anything else the developer decides to add)
You may download the attached custom block package and you may refer to the existing blocks that are available on EasyBlog for more information.
Installing Custom Block
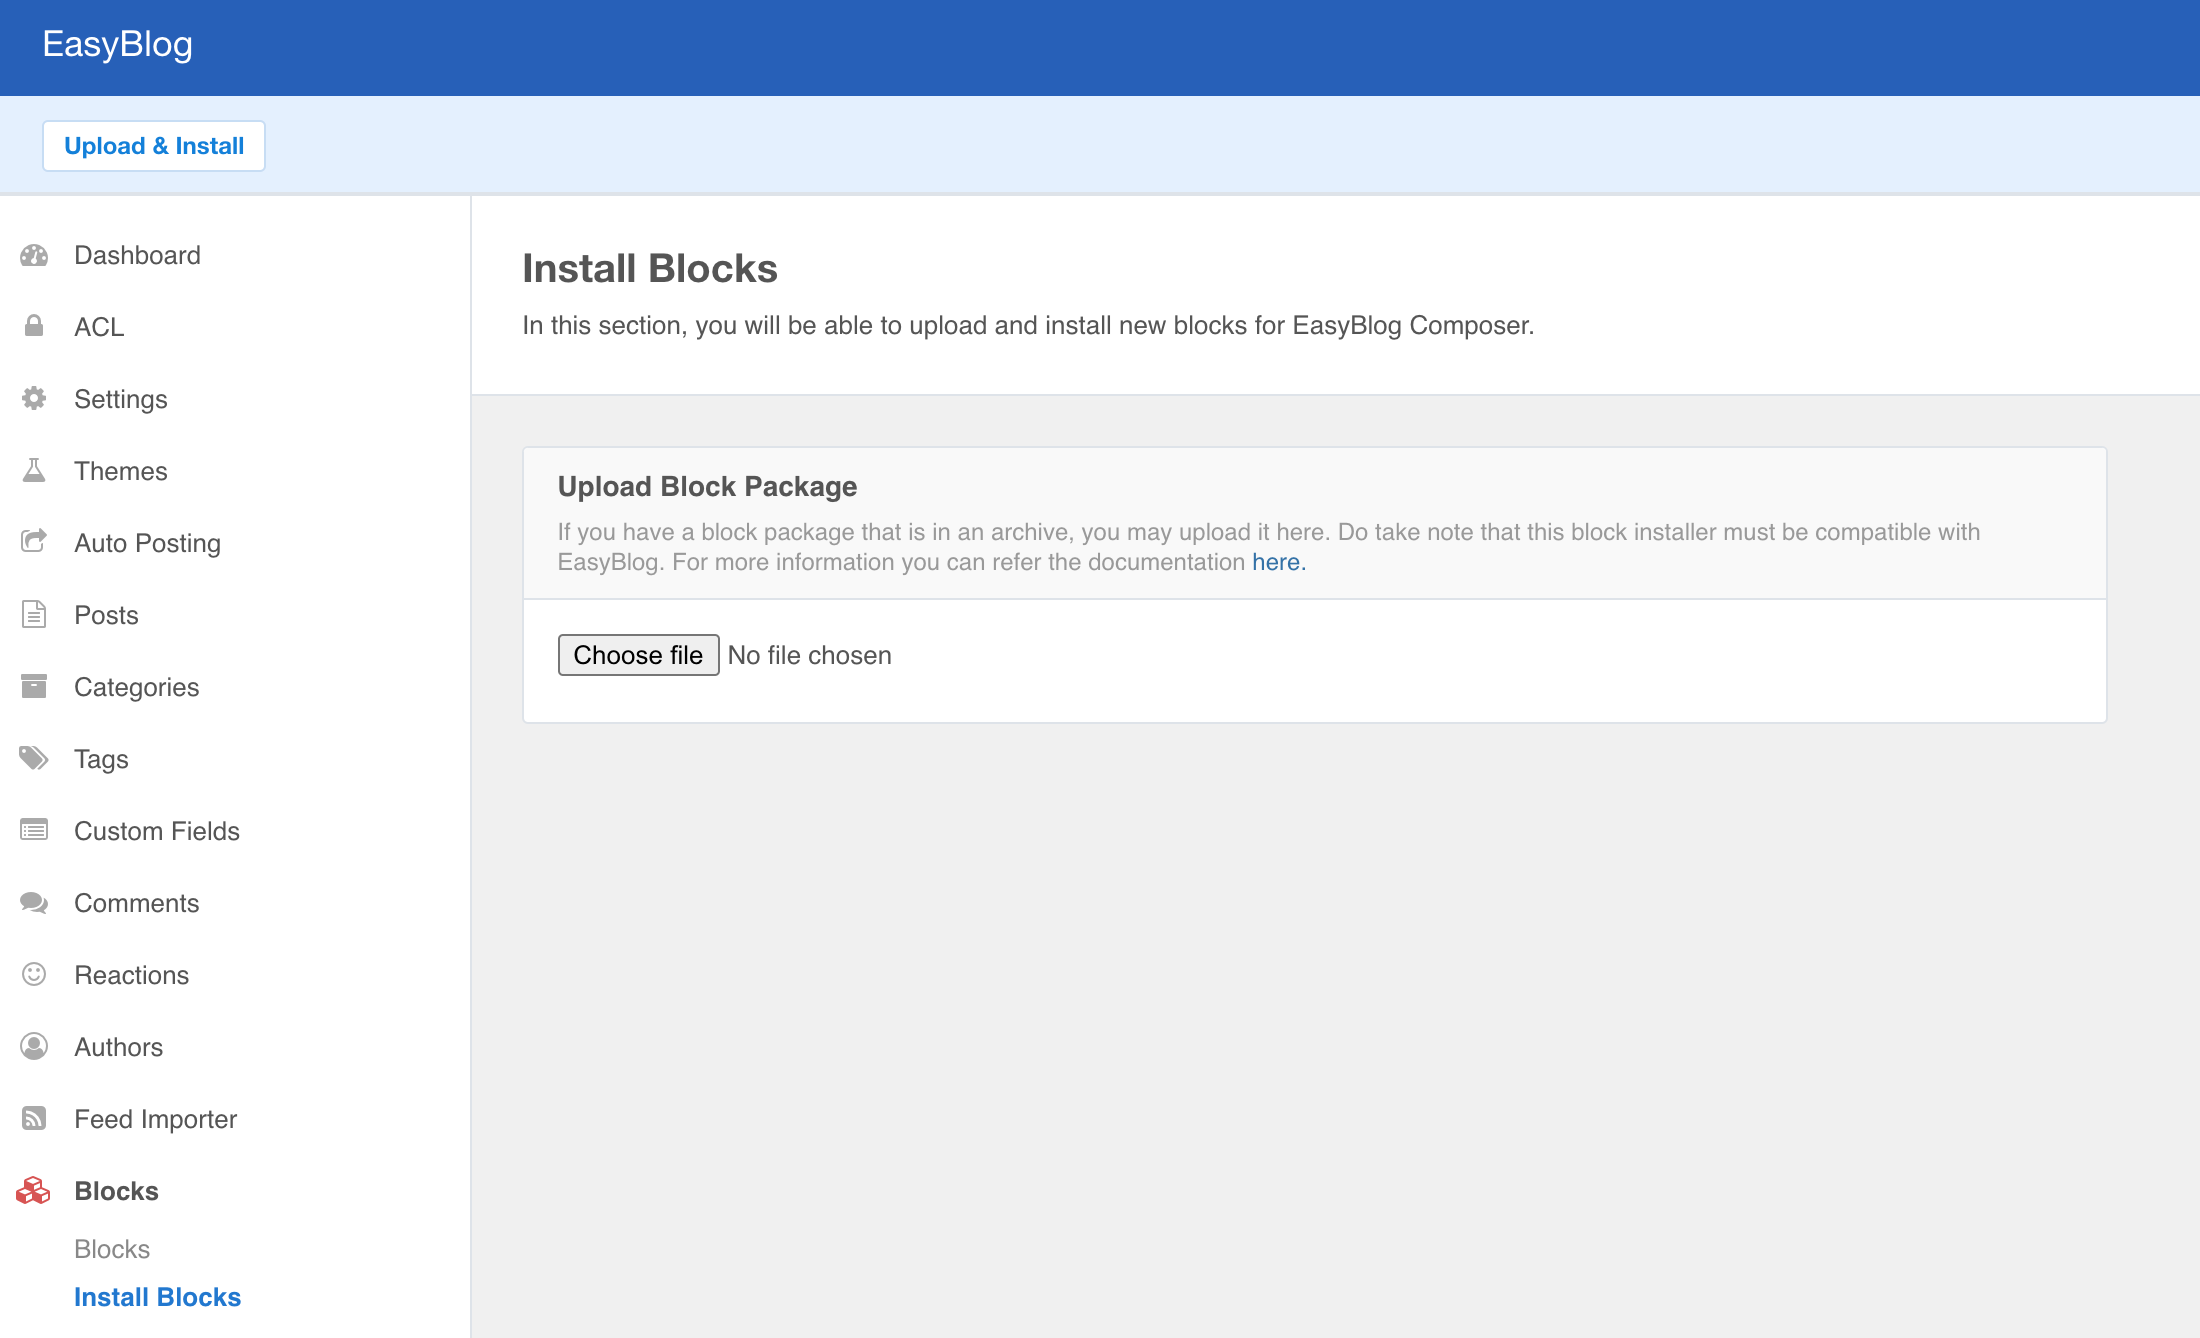
To install your custom block, head over to EasyBlog > Blocks > Install Blocks as shown below. Select your custom block package, and click Upload & Install.
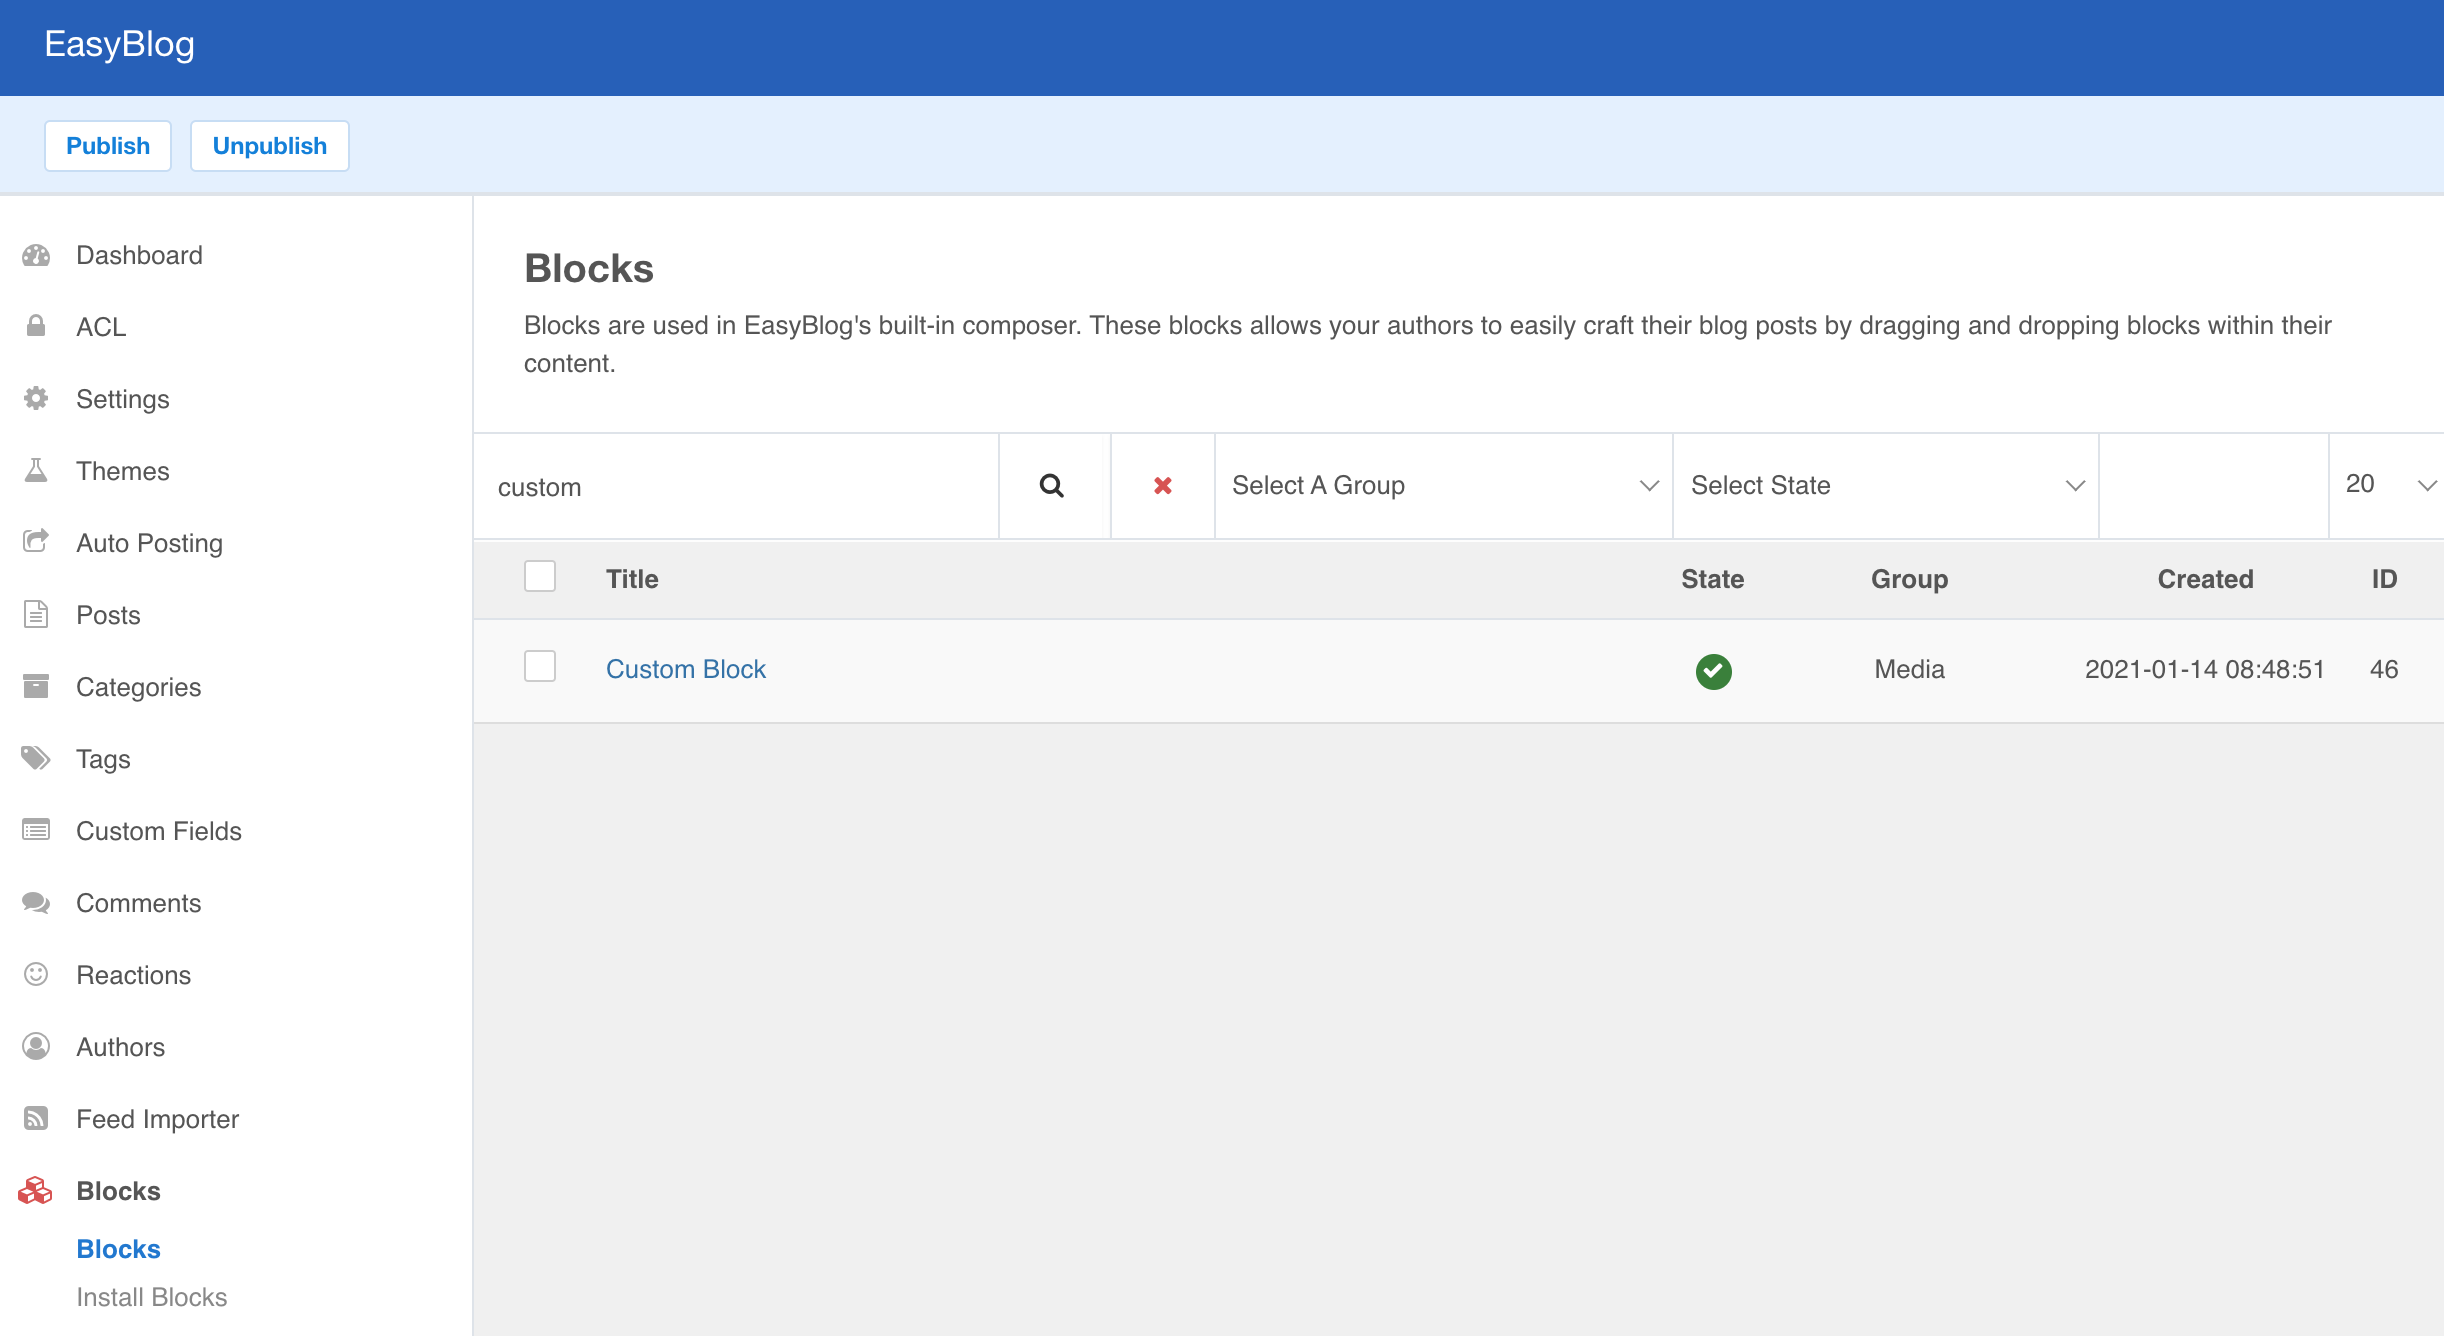
Your newly installed block should be available under Blocks section.
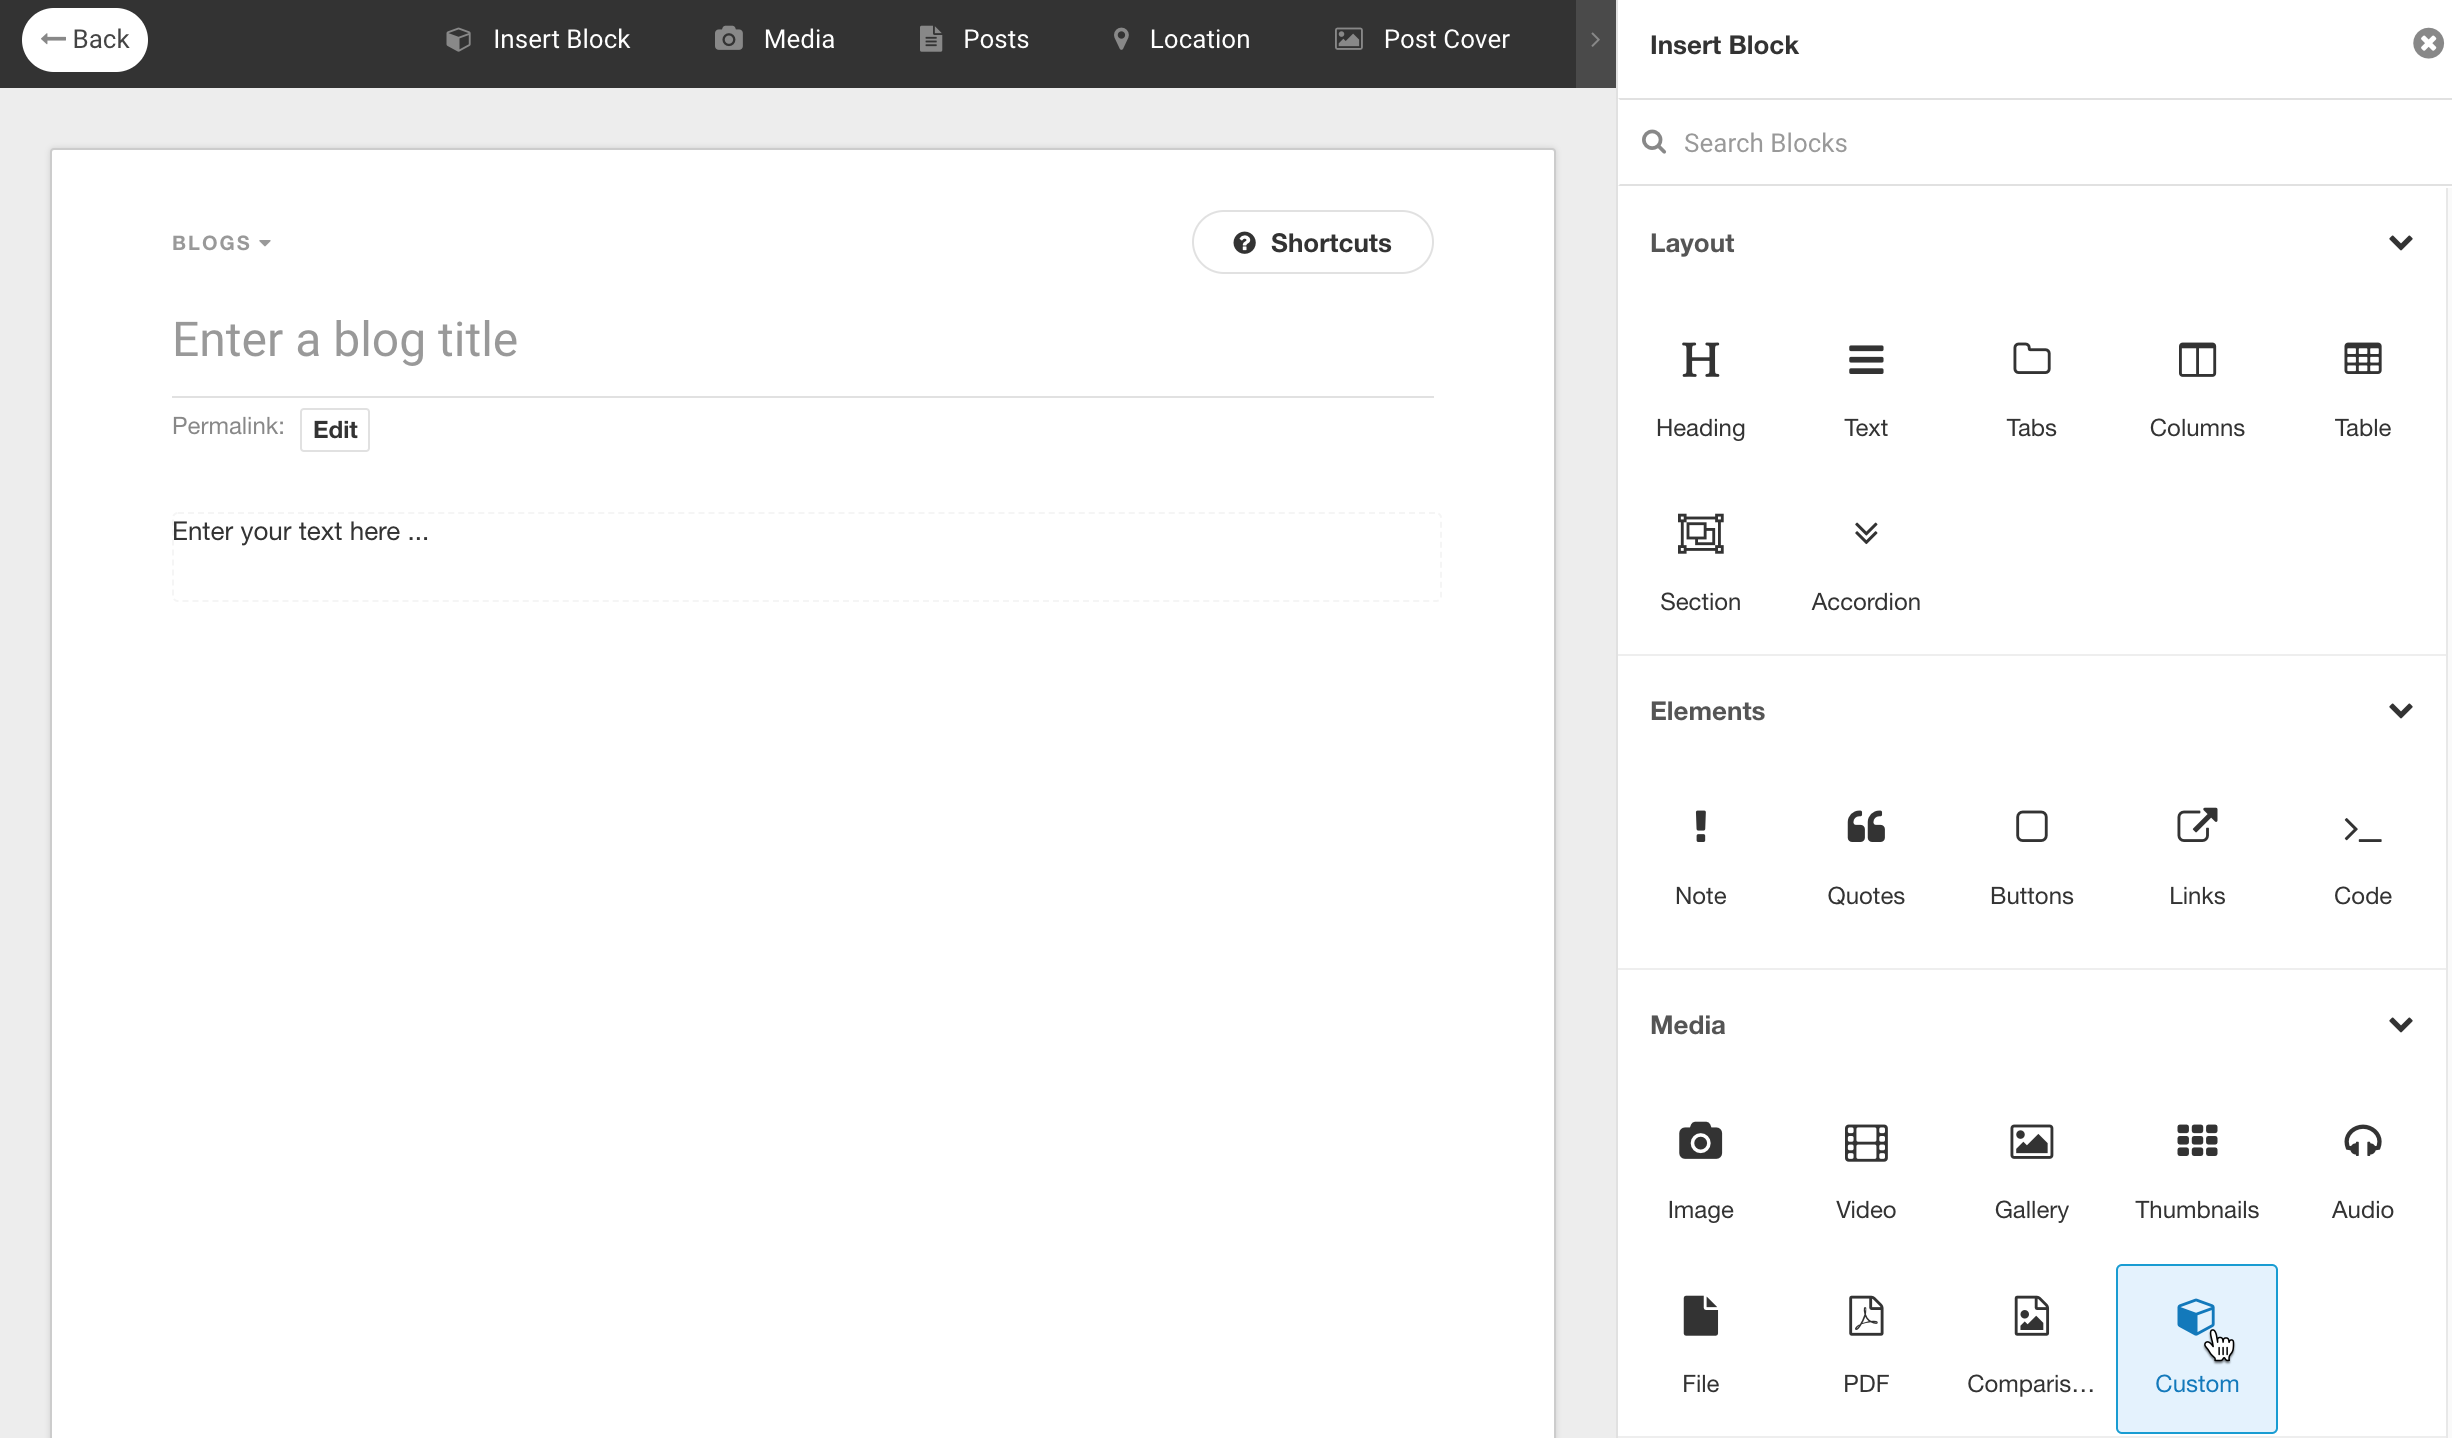
And once published, it should be visible on the EasyBlog composer.